(Building an observatory in the wilds of western New Mexico)

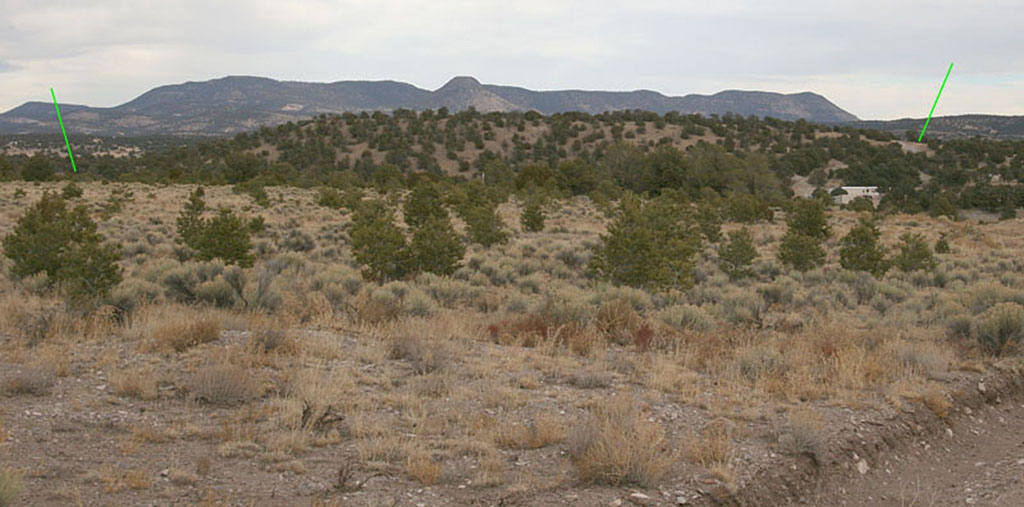
We bought this property just out of Datil, NM in 2005
It is just shy 40 acres. It includes the mesa/plateau at the top and the surrounding slopes.
We pulled the permit for construction in 2007.
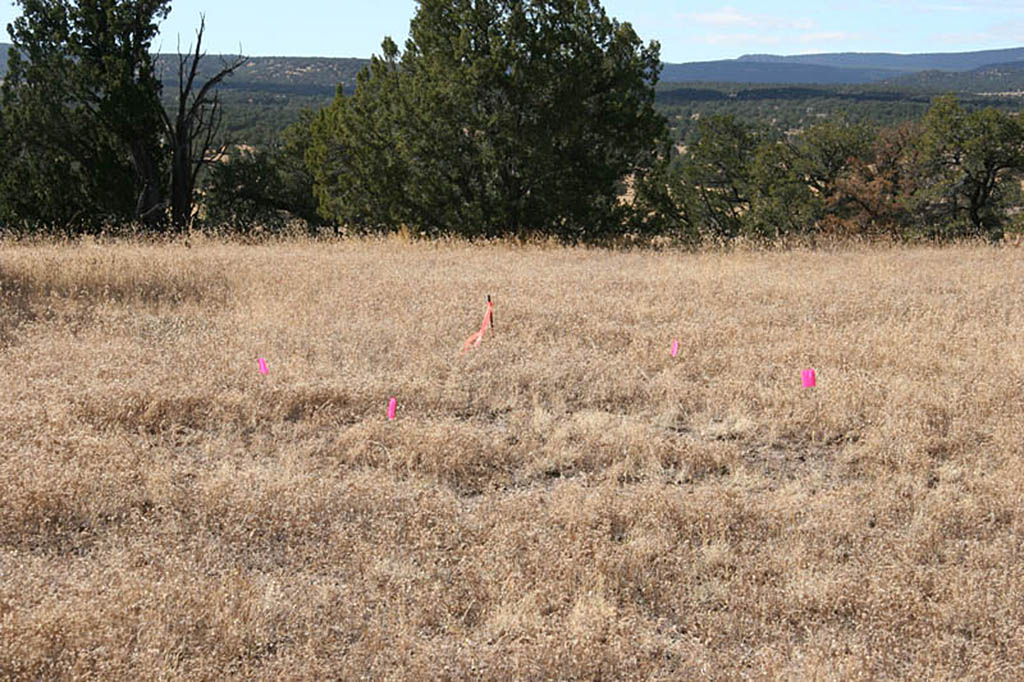
A location is marked out with pink flags to show where to dig the hole for the base of the pier. (View to the SW)
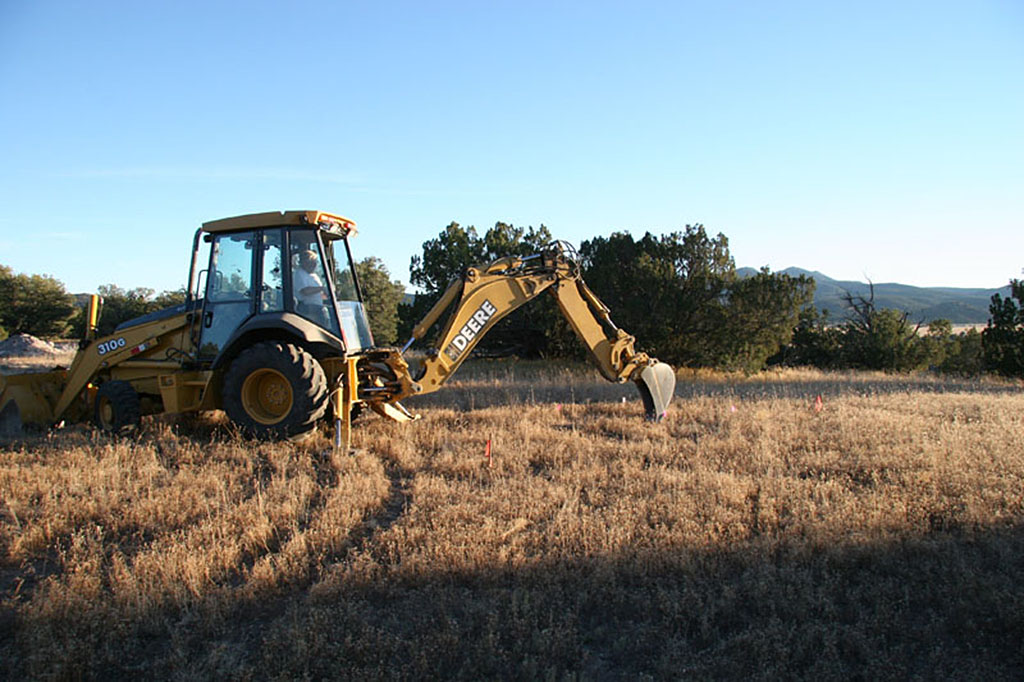
It's time to start digging the hole for the pier block, which will be 6' square and 3' deep.
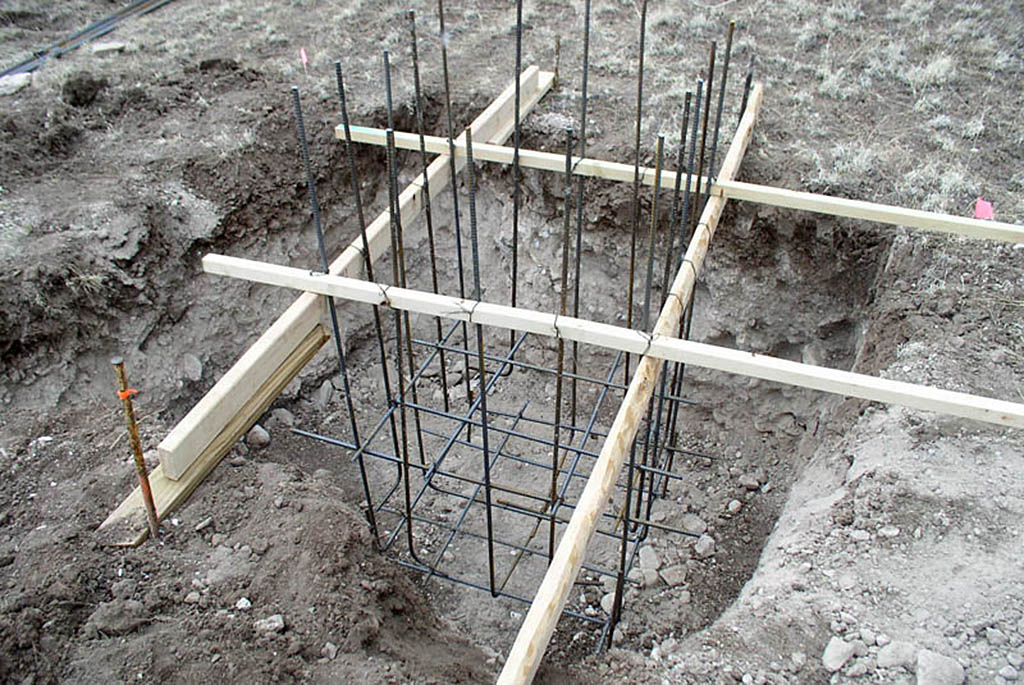
The hole is dug and a rebar reinforcing assembly is built and lowered into the hole.
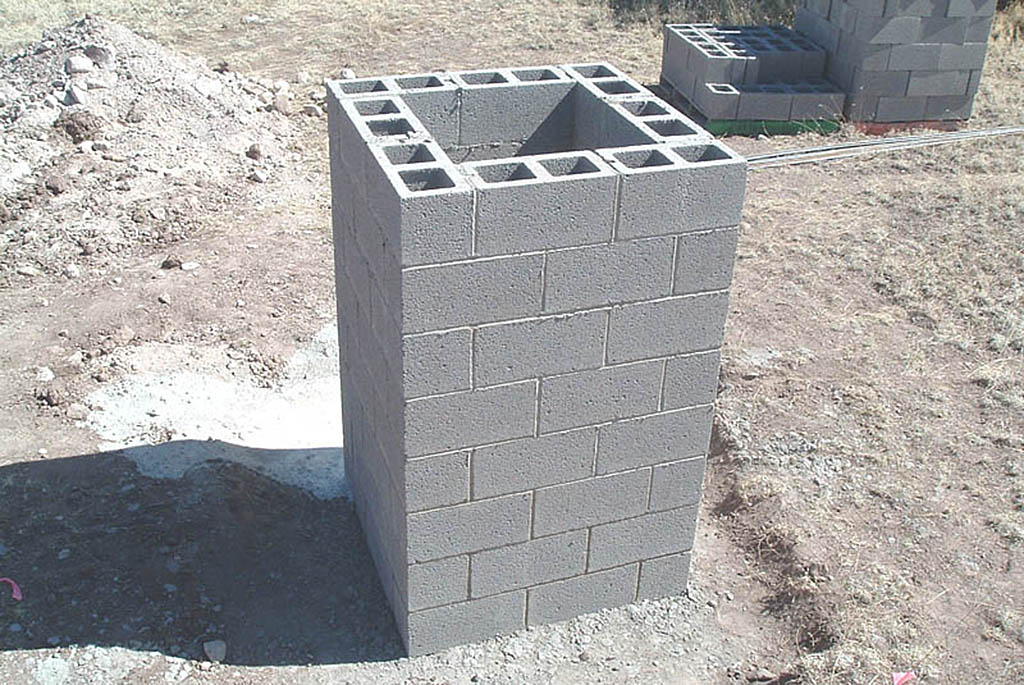
The pier block hole is filled with cement and the 40" x 40" pier begins to grow
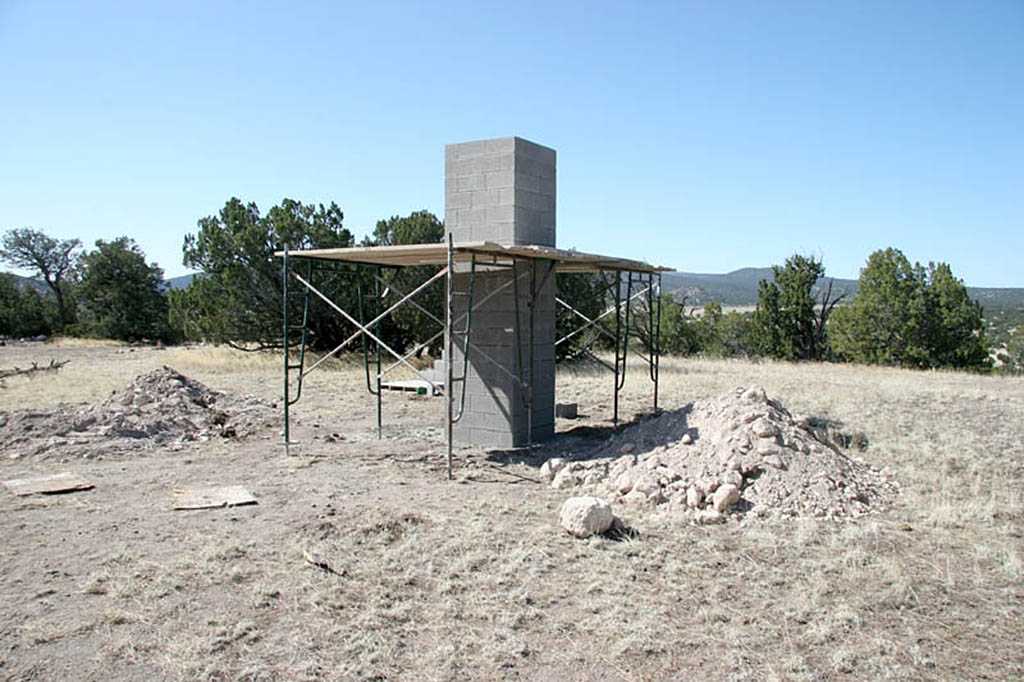
Pier block-work is done and tops out at 12'. (View to the SSW)
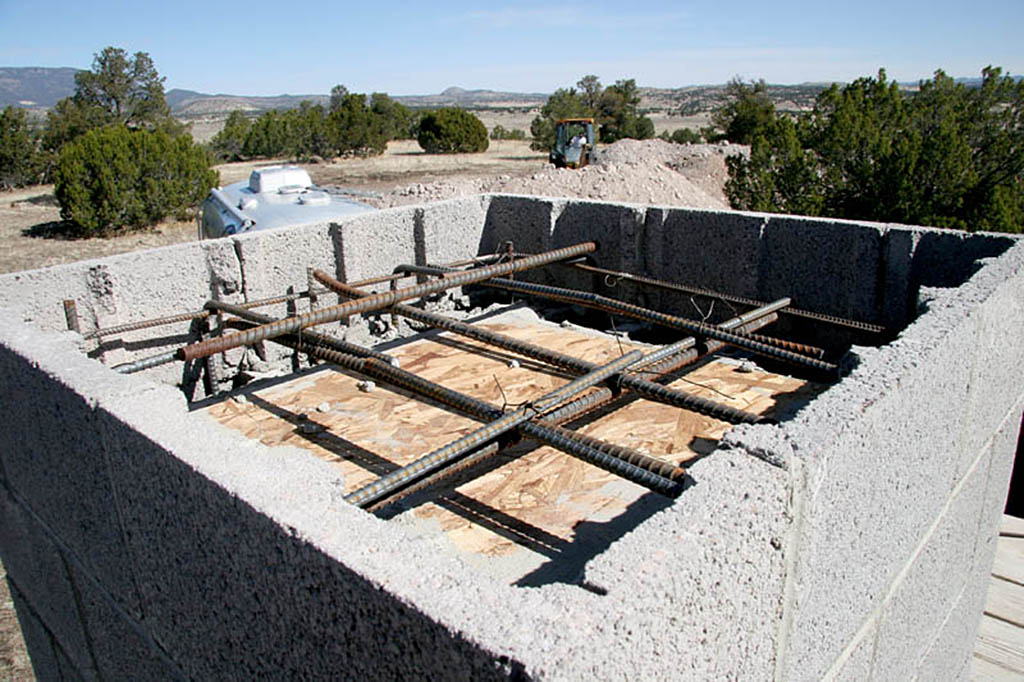
Next job is to make a template to hold the "L" bolts that will secure the steel pier that bolts to the top of the concrete pier
In the background we're digging the hole for the foundation of the house. (View to the N)
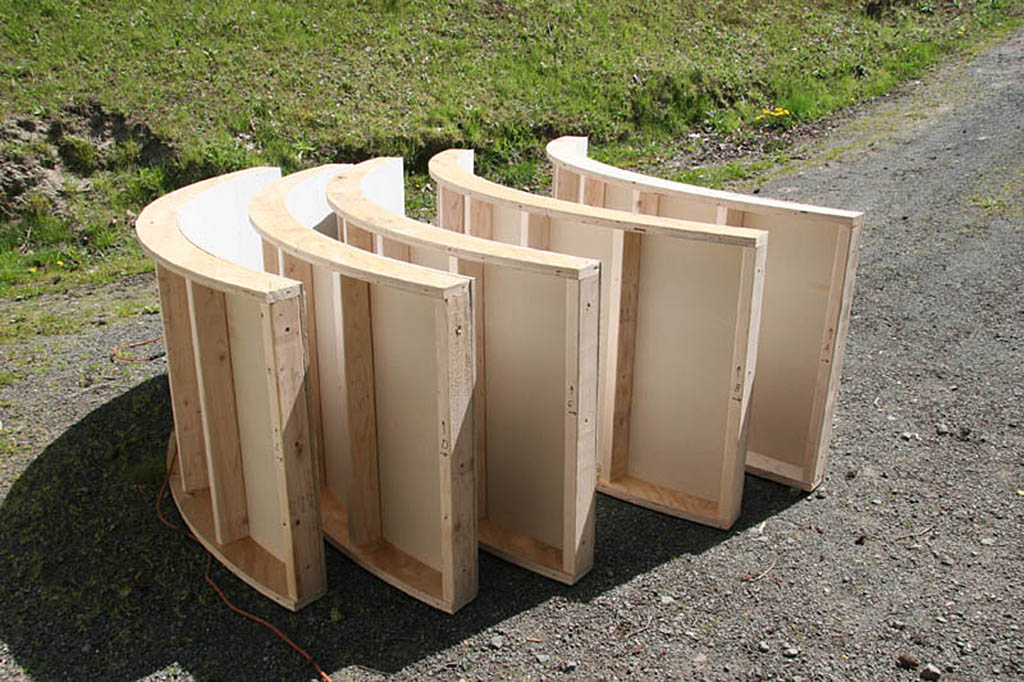
Forms for the observatory floor/foundation are constructed at the shop in Washington State. Each of the ends is marked so
they will bolt together with the correct adjoining panel, to form the 12' 2" total diameter. 5 sections of 72° each make up
the 360° floor. The forms are 34" high, but only 4" will be above grade. The rest will reach down below the frost line which is at
around 24" in this area of New Mexico
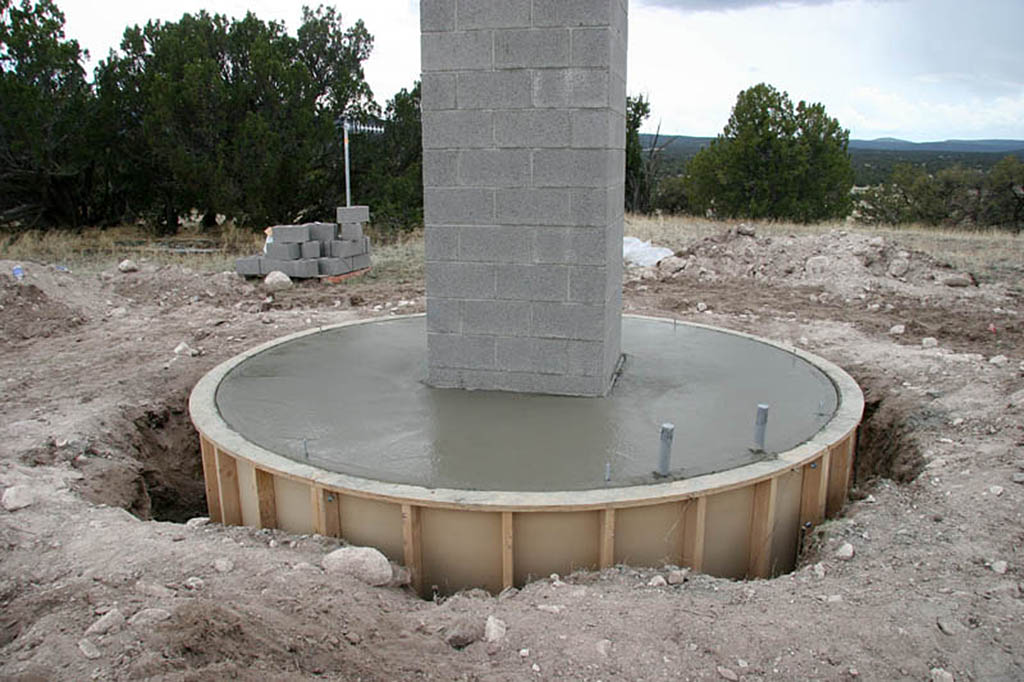
A ditch is dug around the pier and the forms set and filled with concrete
In the background is my cell phone antenna, for better reception.
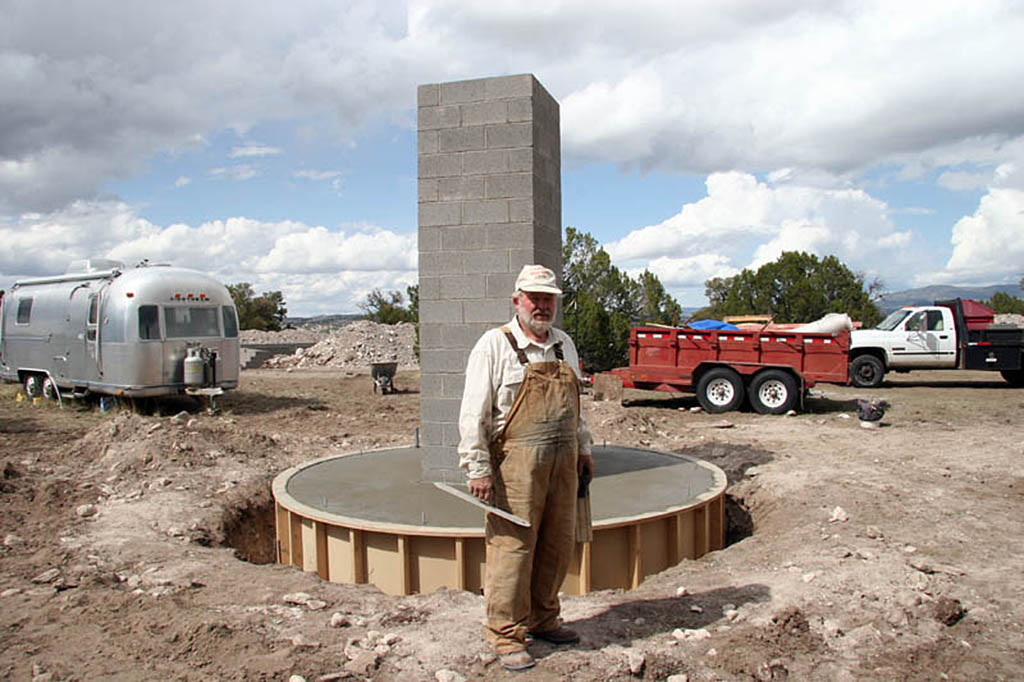
Lee Lucas of Pie Town, expert with concrete in all forms. What a score way out here.
Lee did the concrete blocks on the house and observatory pier and the concrete flat work on the observatory
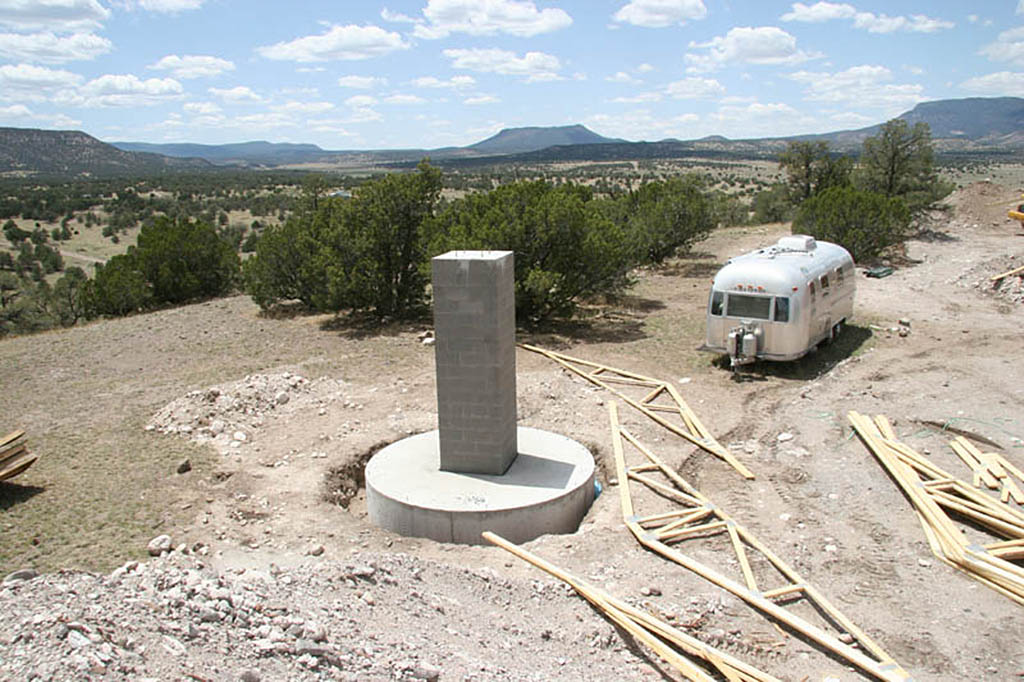
The forms are stripped off (what a job) and the foam pulled from between the pier and floor.
Visable on the top of the pier are the 5/8" bolts which will hold the "weld-to-plate" for the telescope mount.
I took this picture from on top of one of the giant piles of dirt removed to make room for the house foundation. (View to the NW)
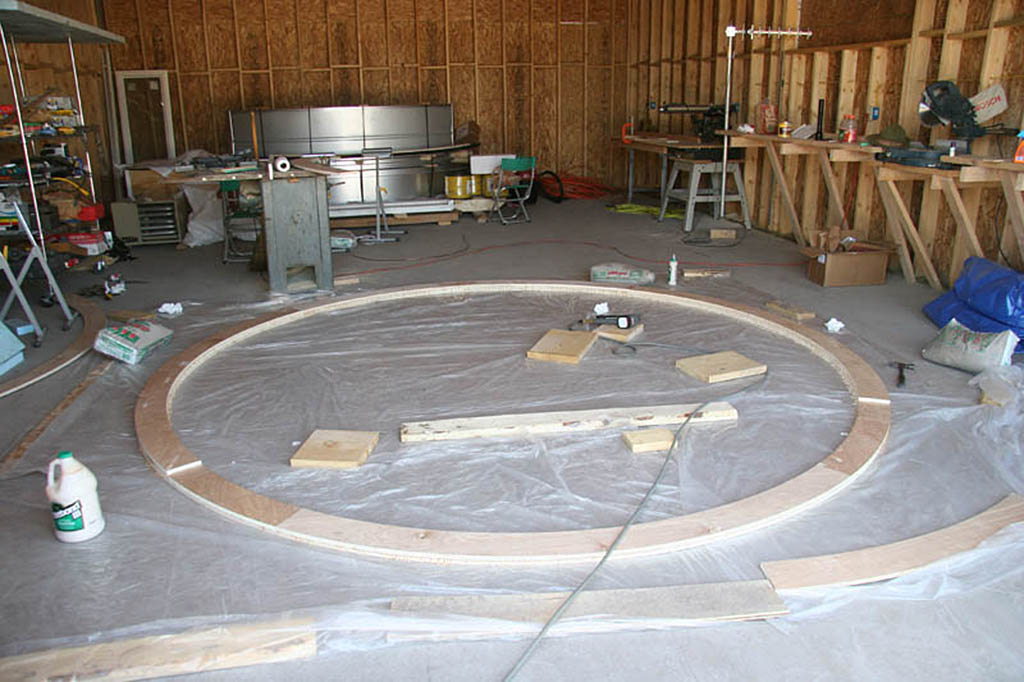
Here I'm building the bottom plate for the walls of the observatory.
This is made up of 3 layers of 3/4" plywood glued and stapled together.
This plate will be bolted down to the floor of the foundation and the walls will be nailed to it.
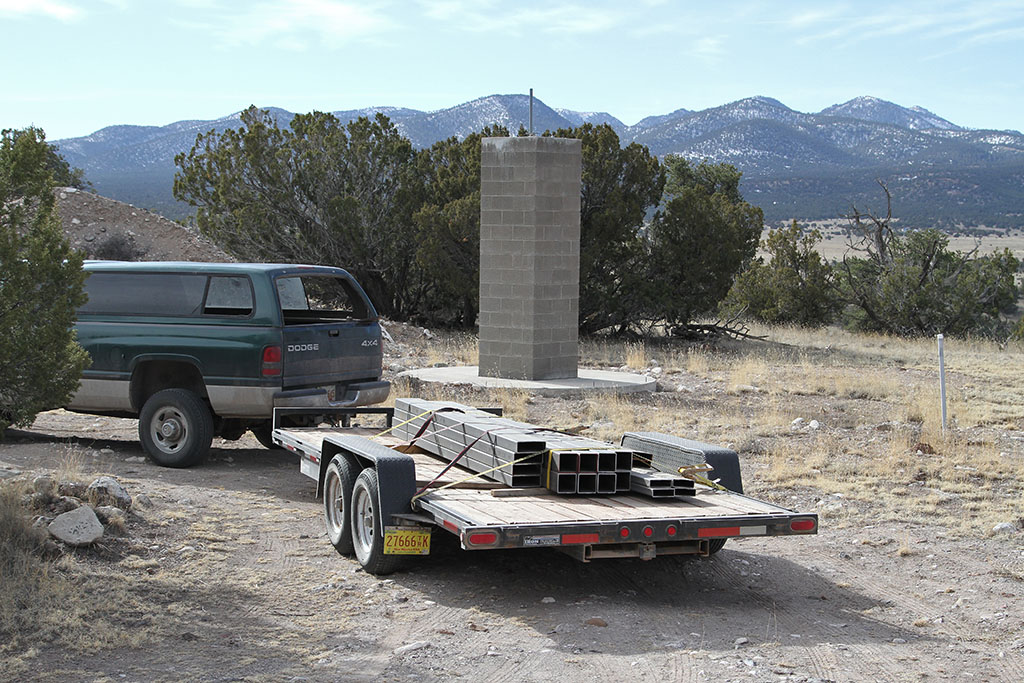
Fast forward 12 years. The house is done (finally) and we are living here.
In this time I have discovered just how fast the extremely dry climate and UV destroys wood.
I've decided on a new approach to the observatory walls and gone to Albuquerque and bought a load of steel.
Now the observatory will have open steel legs instead of conventional stick framing.
Glad I figured this out before I built!
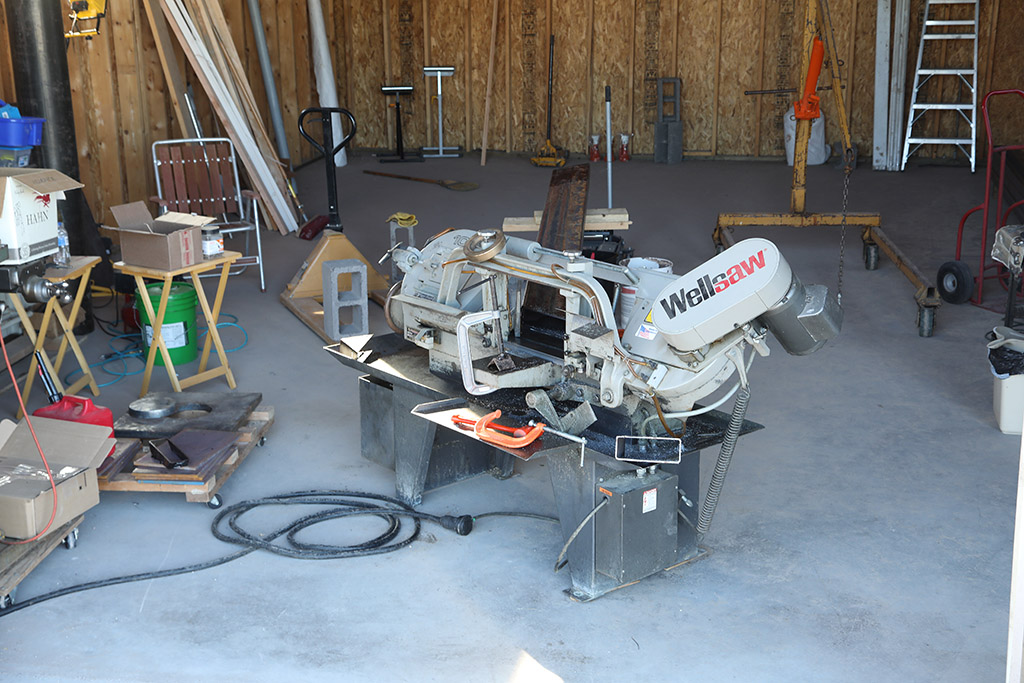
After moving all the stuff from Washington in to the shop, I had to move all the stuff out, so I have a place to work.
What a job!
Got the saw set up and started sawing the 3 x 8 x 3/16" rectangular steel tubes which will make up the observatory floor base.
It's nice to get back to working metal again.

Finally got the ring pieces cut and adjusted to fit and ready to weld.
I used what will be the legs to build a stage to put the ring parts on.
The "legs" are laying on concrete blocks, and leveled up using plywood chunks and tongue depressors.
The metal plate sitting on the closest corner is where the leg(s) will weld to (one on each corner) and will actually be on the bottom side.
I just have it sitting there to make sure it fits the way I want it to, since it's wider than I wanted.
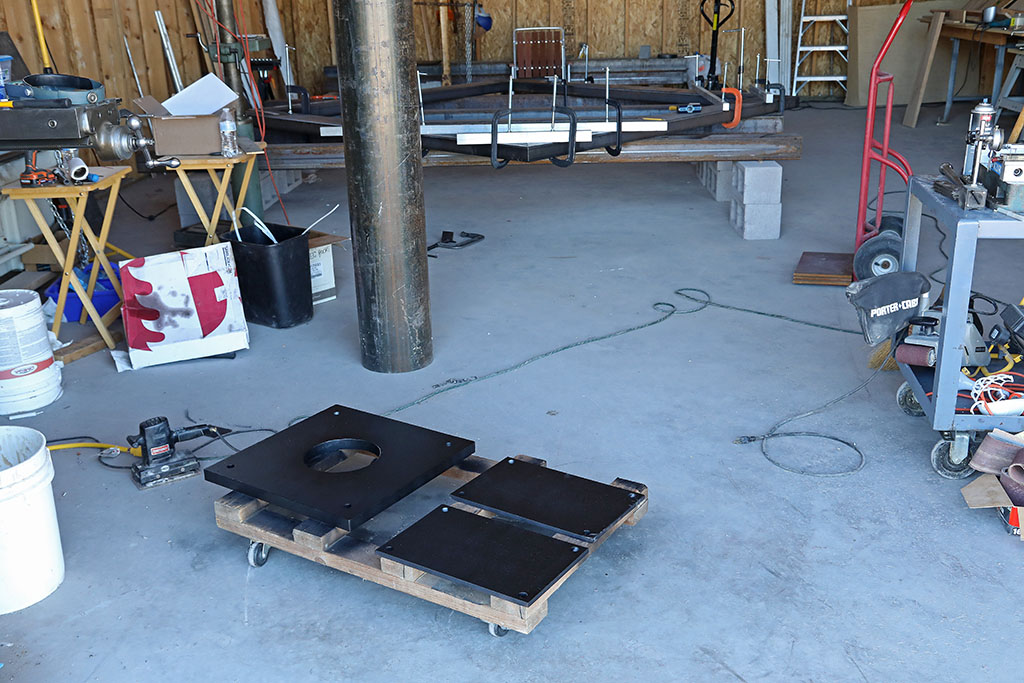
When I ordered the steel package I asked for a 20" square piece of plate with an 8" circle plasma cut out of it.
I told them it could be 3/4" thick on up to an inch or so, "whatever you've got laying around".
So I guess no one wanted this piece of 1-1/4", so I got it....lucky me.
I can't even pick it up, so everything has to be done with mechanical assistance.
This is going to be the weld to plate for the column that the mounting plate (for the mount) welds to.
The steel pipe standing up behind El Lunko here is 10" thin wall pipe.
I managed to get this plate on the mill using the tractor with it's forks and carefully slid it from the forks to the table.
I Drilled the 4 little holes (25/32") in the corners and slid it back off again.It will be mounted on the four 5/8" bolts at the top of the concrete black pier.
Then the 10" pipe will be welded to that and finally the mount plate welded to the top of that.
Next to it on the cart are two of the four plates that will be bolted down to the cement for the legs to weld to.
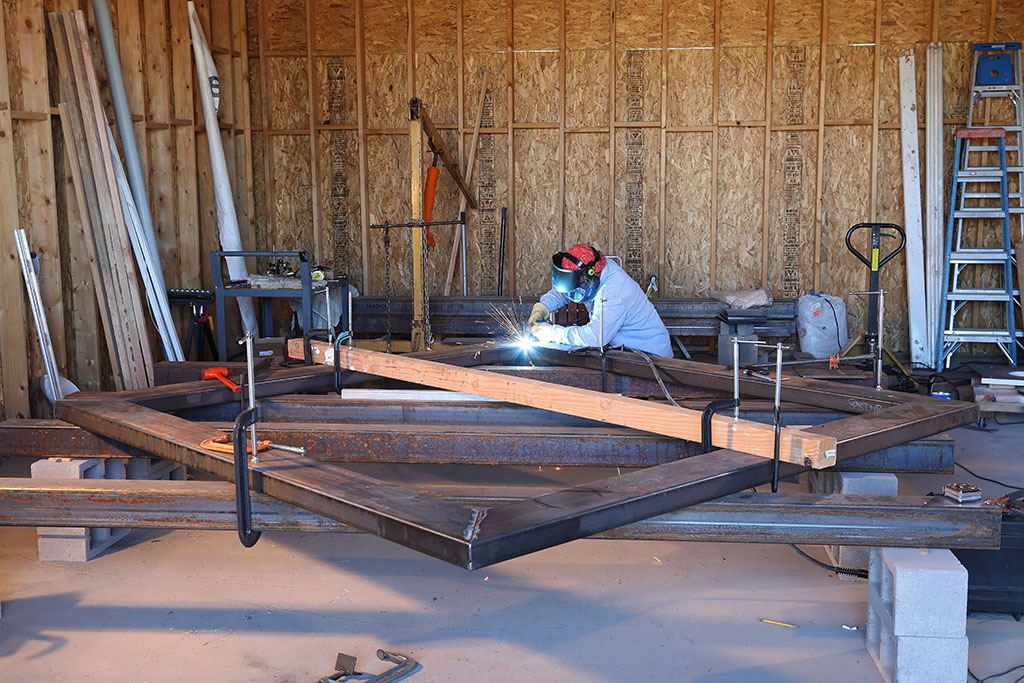
Welding Day!
Donnie Stallones (ace welder) came over and we started sticking the steel together for the superstructure of the observatory.
First he went around and tacked the corners in place.
(We did have to beat on the last corner a bit to get it to come out square.)
Then Donnie went around and welded up the seams which will be the top of the main floor assembly.
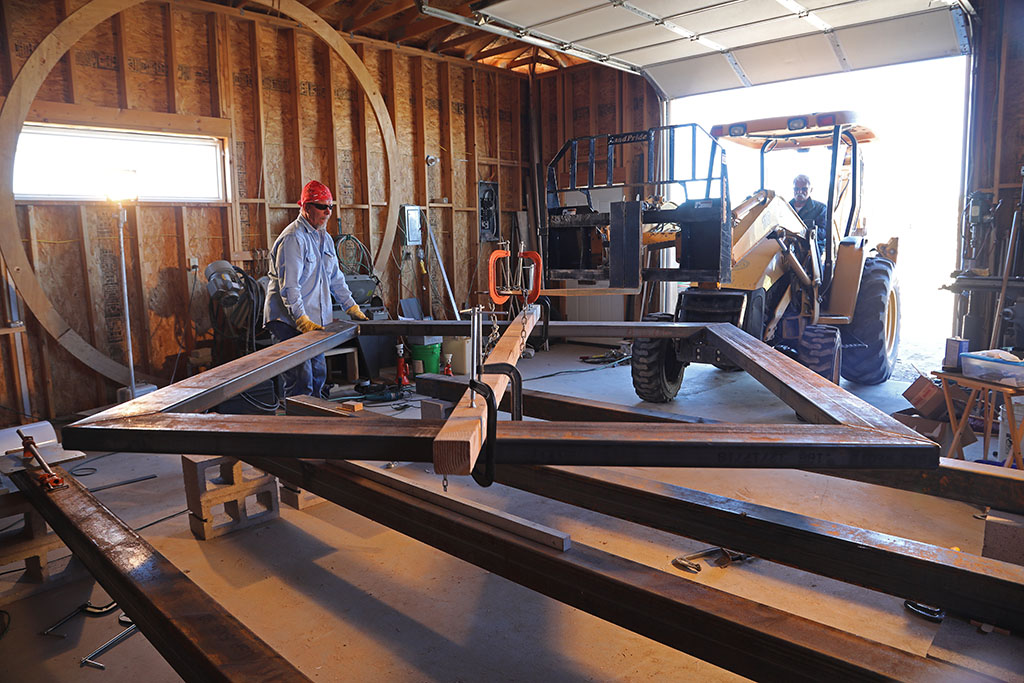
Then we picked it up with the tractor and moved it outside.
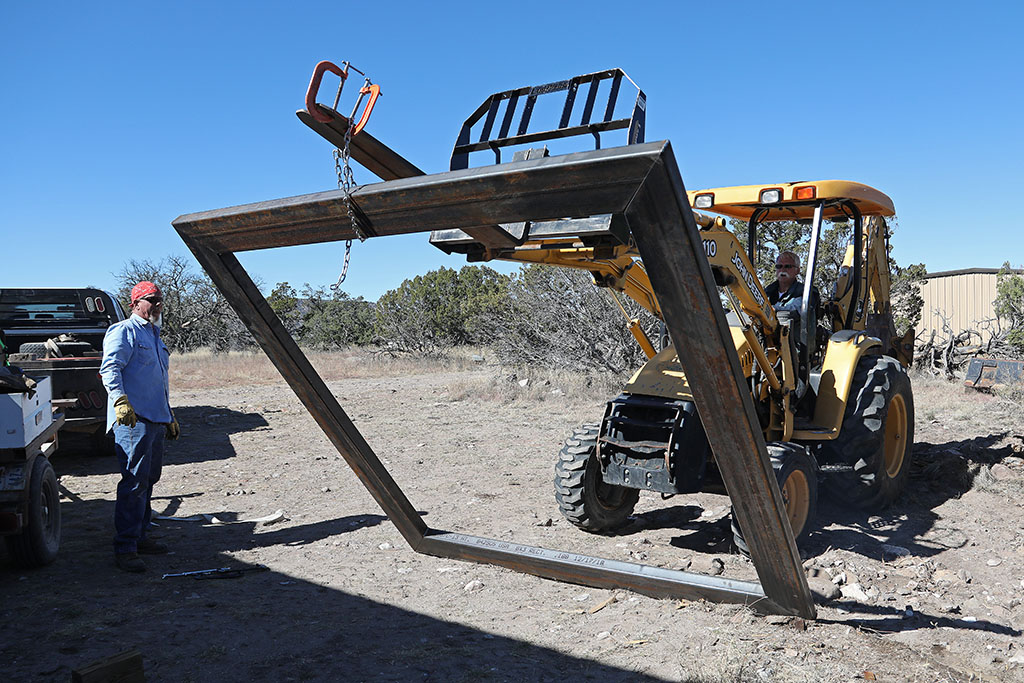
We flipped it over so what will be the bottom is up so Donnie could weld the remaining seams.
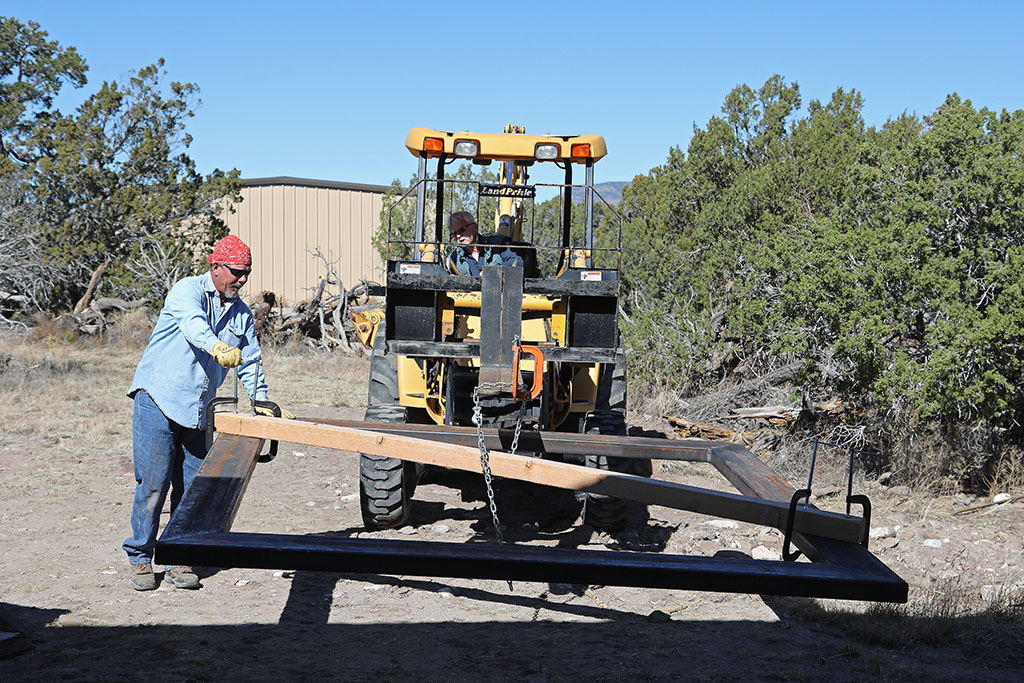
Picked it back up and moved it back inside.
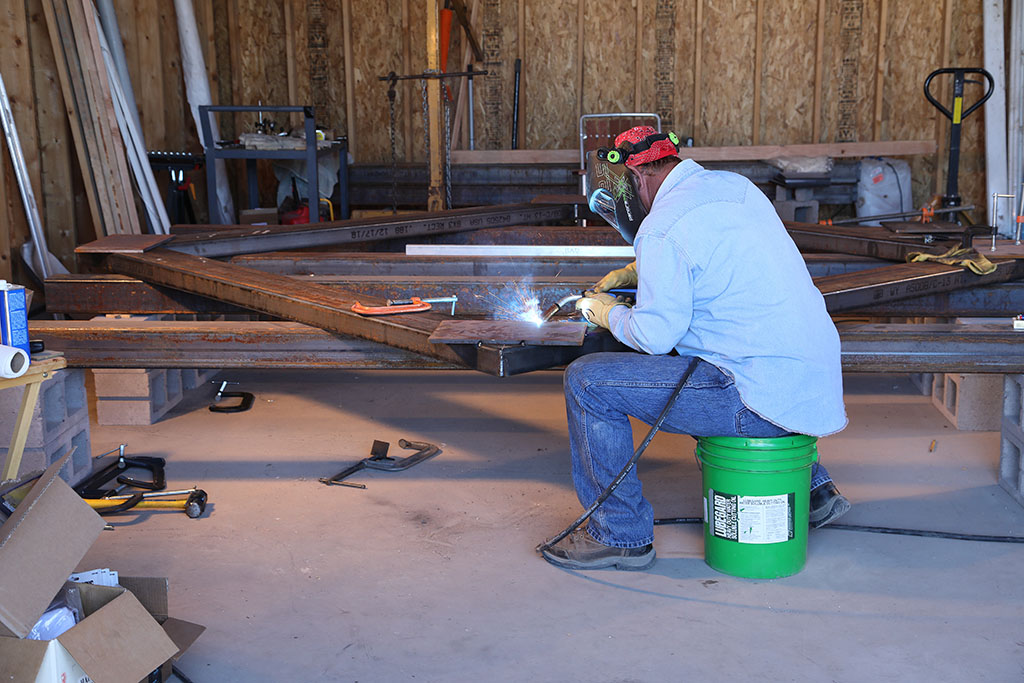
Then he welded the 10x16x1/2" plates to the corners.
This is where the legs will be welded, to hold up the floor of the observatory.
Remember this is the bottom side.
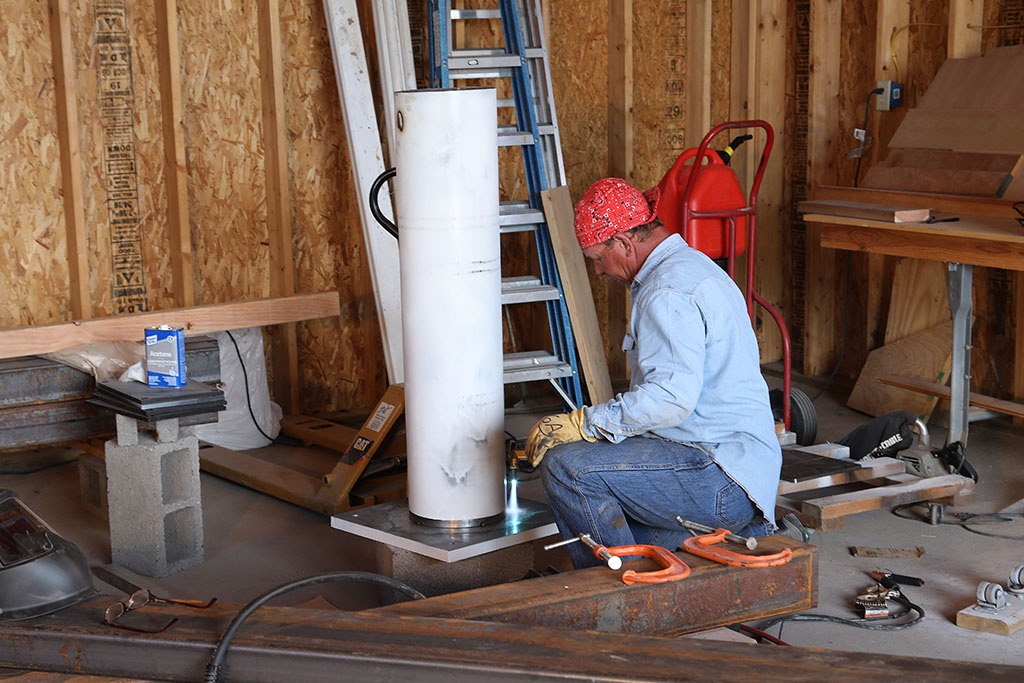
After those got welded we focused our attention on the pier and welding the tube to El Lunko (the big plate).
Donnie had to heat El Lunko up with a torch because it was, well, El Lunko
and I guess you have to warm up big pieces of steel like that so the weld will take.
The problem being El Lunko is 1-1/4" thick and the tube is only 3/16" thick.
Good thing he knew about that kind of thing.
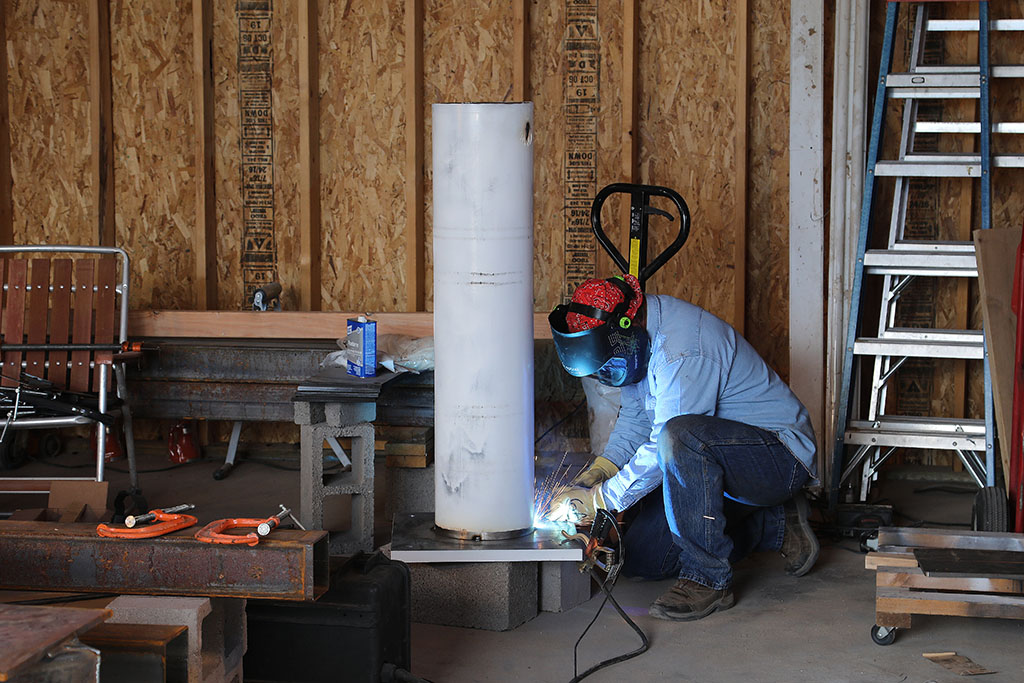
Then he welded it up.
I don't think it's coming loose.
He also welded a cross piece inside (you can see the burn spot just down from the top),
to pick it up and put it on top of the concrete block pier.
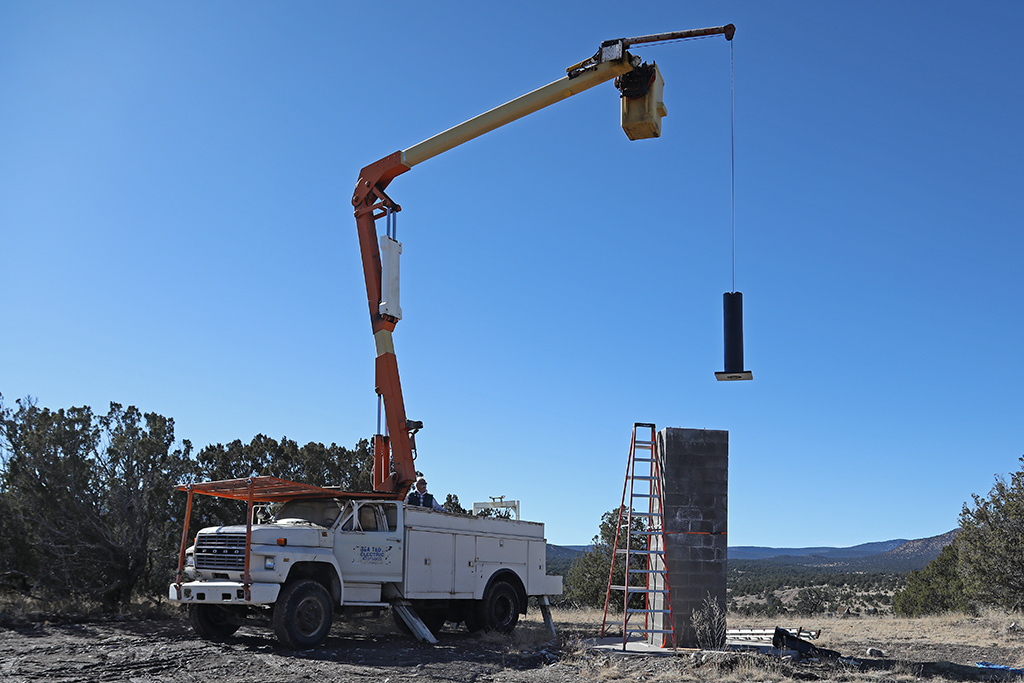
Pier Flying!
Boy the cold weather sure slows down production......
Got the big truck running (it needed plugs) and moved it over next door to the observatory.
I picked the metal pier up and got it pretty close to its home. (The truck didn't have any trouble lifting it.)
Then I gave Linda some quick instructions on running the hydraulic controls and let her practice a bit.
I went over and climbed the big stepladder which we had strapped to the concrete block part of the pier.
With a little jockeying we got it settled down over the pier mounting bolts in the top of the concrete blocks.
Linda did good running the big truck.
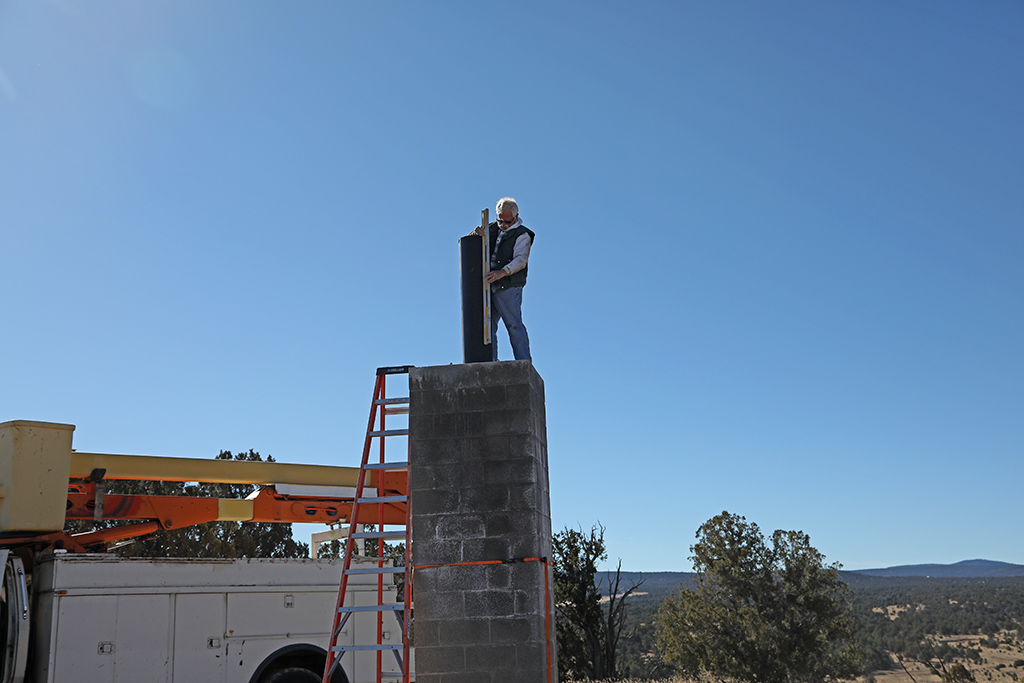
It's pretty vertical now.
It will have to be re-leveled once we get the top welded on, but I can't do that part until I get up there and sight in Polaris
and I really can't do that until I have somewhat of a floor to stand on.
Now I don't have to think about this part any more.
It's 11' to the top of the concrete block part of the pier. That will put the scope at about 16' when it's all done.
Progress!
After waiting all winter because the epoxy can't be used in less than 40° temps and then waiting
some more because of the back surgery, I decided to see how well I might be able to take the next
step in observatory construction: installing the weld-to plates.
These plates (4) will be what the legs weld to to hold the superstructure (floor walls dome).
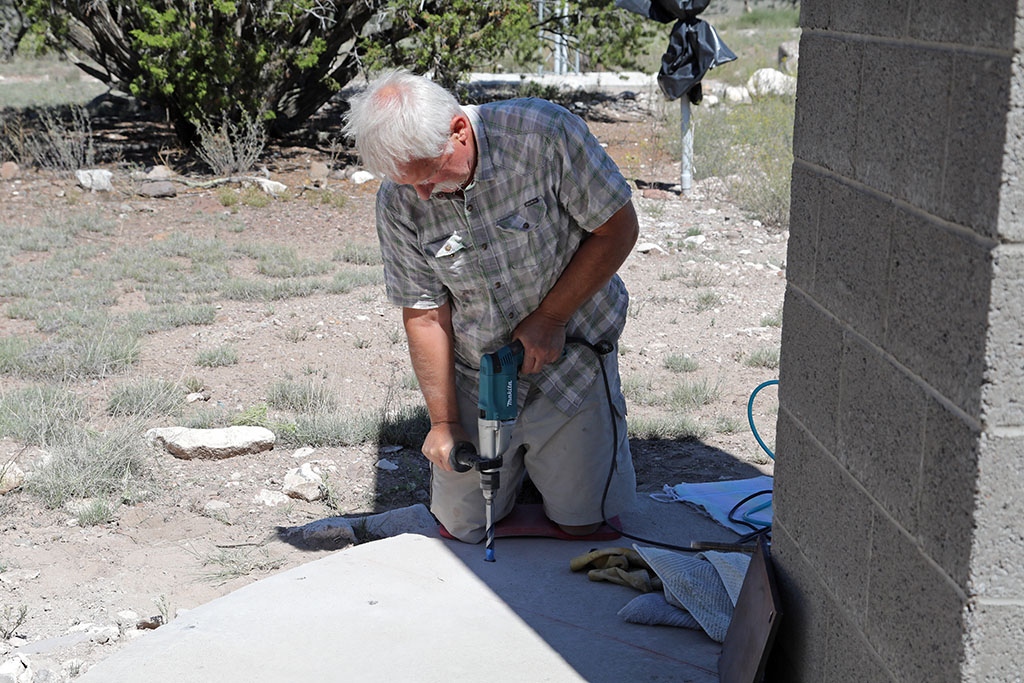
First drill holes in the concrete for the bolts to go into and be held by the super epoxy.
I marked the concrete drill with some blue tape so Linda could tell me when I was there.
This is the part I was dreading with my back in the shape it is in, but so far so good.
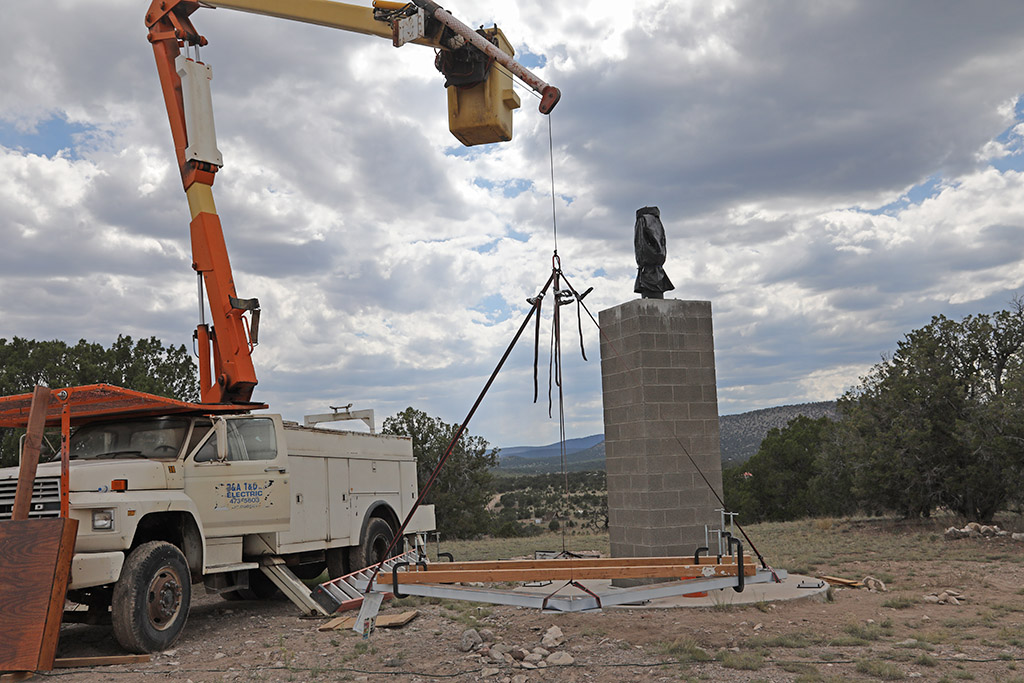
We've got all the plates down and bolts glued and we got the superstructure ring out and hanging from the winch.
If the rope (etc) doesn't brake by tomorrow we'll try flying it up to the top of the column.
Basically the 4x4s have to straddle the pipe (pier) up on top.
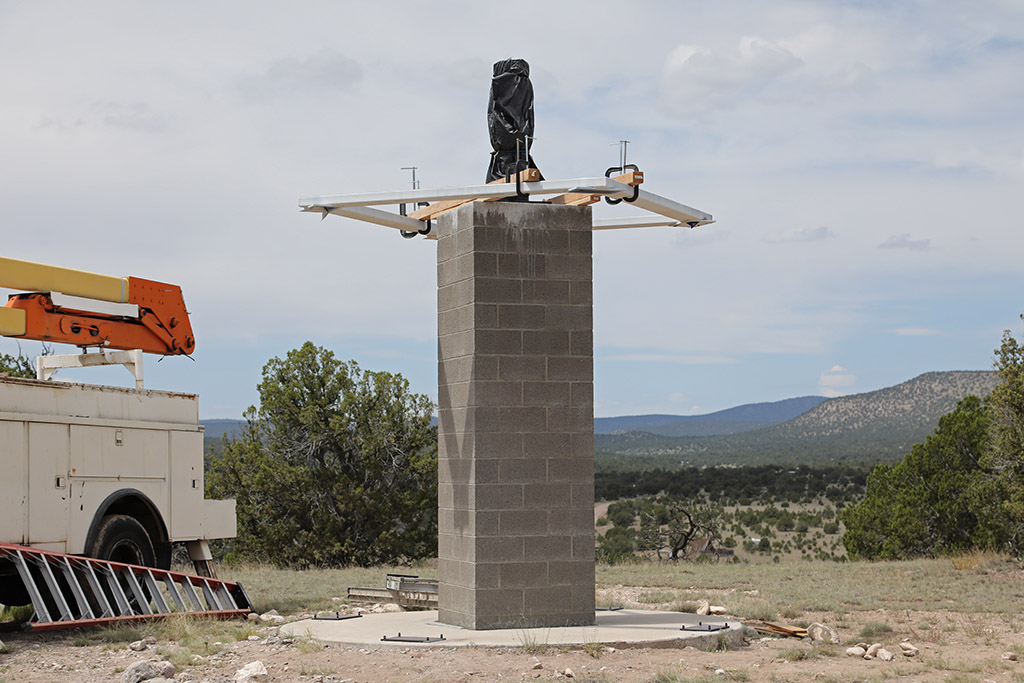
Yay truck!
It worked.
We were able to fly the ring up to the top of the column this morning and it's still sitting there.
Now I have to use a come-along to center the ring around the pier and then try to lock it in
position and start fitting the legs between the weld-to plates on the slab and the corners of the ring.
First I'll have to make a test leg out of wood and then cut metal if all is well.
Then Donny gets to come back and weld it together.
Observatory legs!
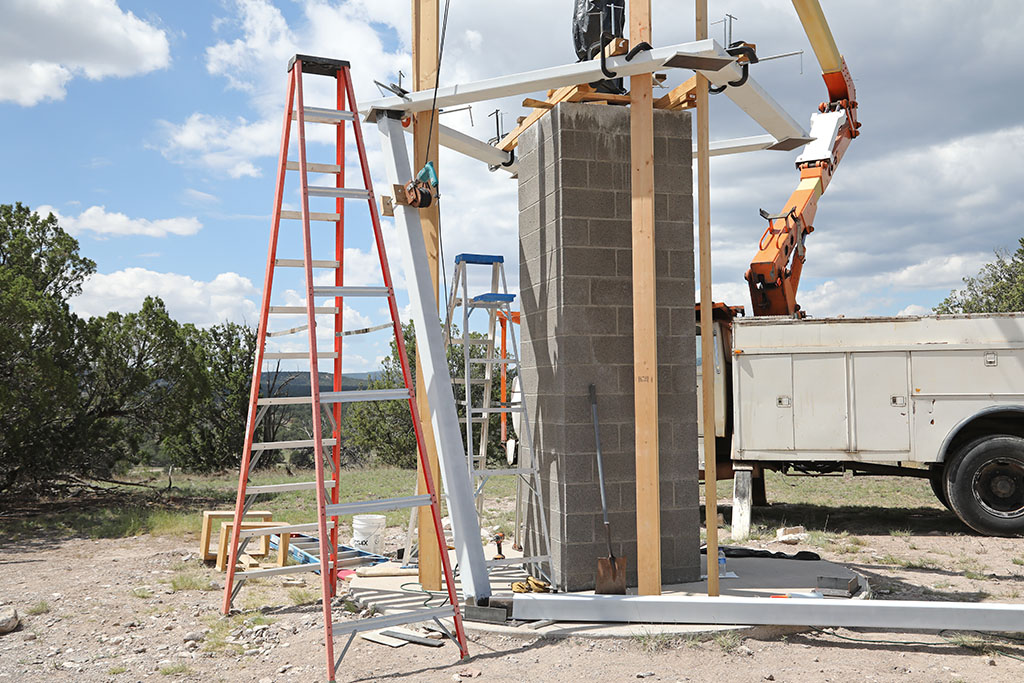
Today we began putting the actual legs in place to see how much prying we need to do to get them to fit right.
There's the first leg held up by the 'lectric drill-winch. It wasn't too bad of a fit. I think Donnie will be able to weld it just right.
There's the second leg off to the right laying down. We did get that one fit today also.
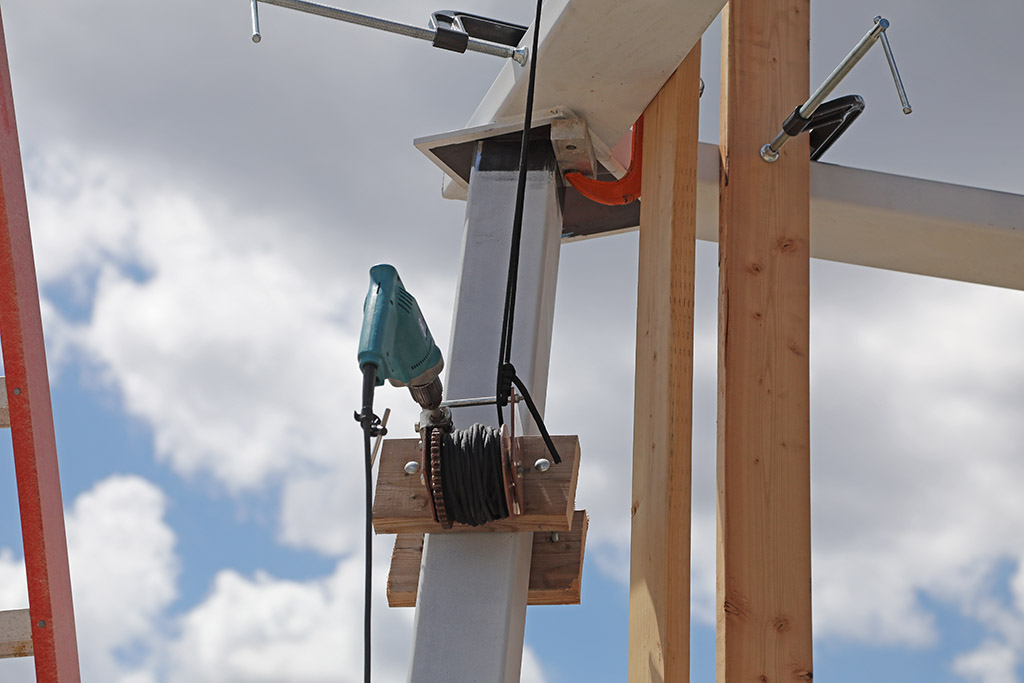
My garage sale $5 winch run by the drill. The winch is worm drive so it can't back up when you take power away.
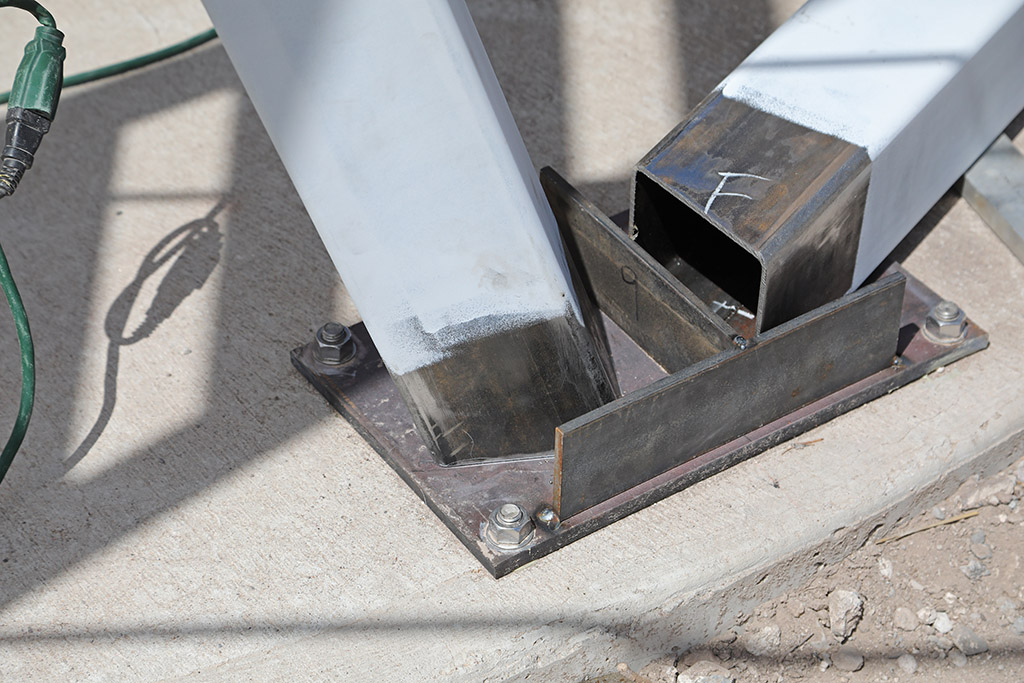
The bottom of leg "A". They are 5" X 5" X 3/16" just under 12' long.
Donnie welded these "Ts" on so we would have something to pry against and put shims on, etc.
When everything is welded they will be taken off. The "F" leg is slightly shorter than the "A" leg.
8 legs total.

Got the legs all welded up yesterday. Got some paint on the bottoms but still have to do the tops.
Next we'll be moving back into the shop and start constructing the floor joist assembly.
That will be welded to the top of "the ring" and the plywood floor and wall (that supports the dome) will be mounted on top of that.
Still have to get up a ladder/scaffold and paint the tops of the legs.
Once we have the floor joist assembly done we'll fly it up with the crane and weld it on.
I wish California would stop burning up their countryside. This smoke is getting tiresome.
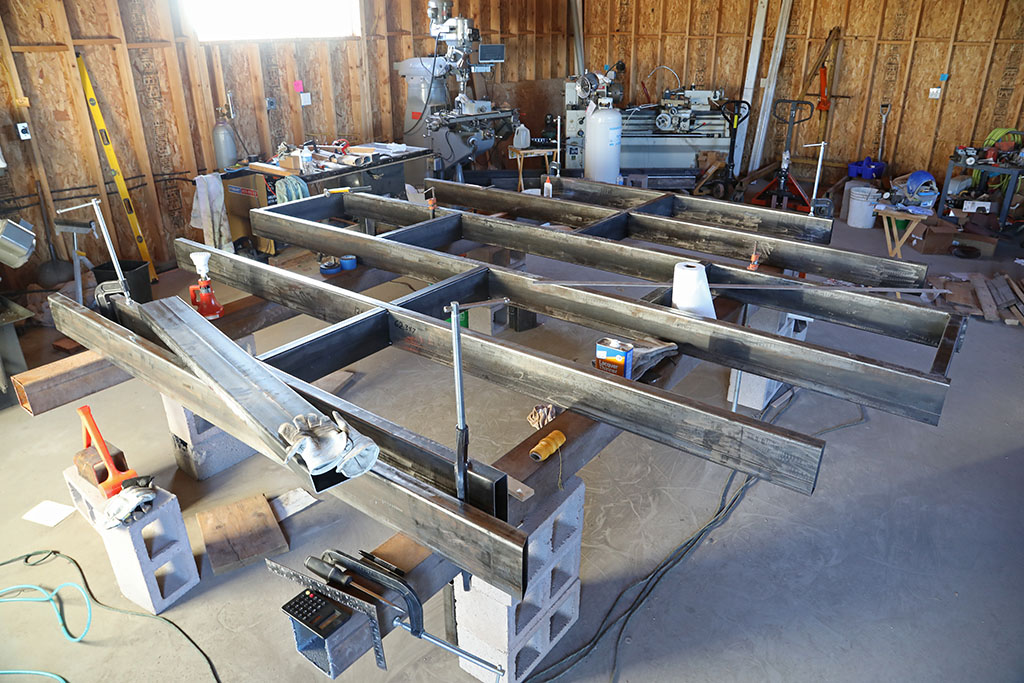
Meanwhile, back in the shop.....
Set up a welding "table" and am starting to assemble the floor joist assembly.
I discovered that I am just competent enough to tack weld with my wire feed welder.
By the time Donnie gets back I should have all the pieces tacked and ready for him to do the real welding on.
Then it gets a paint job and gets to fly up to the top of the ring. Plywood floor and the walls and finally the dome sit on this.
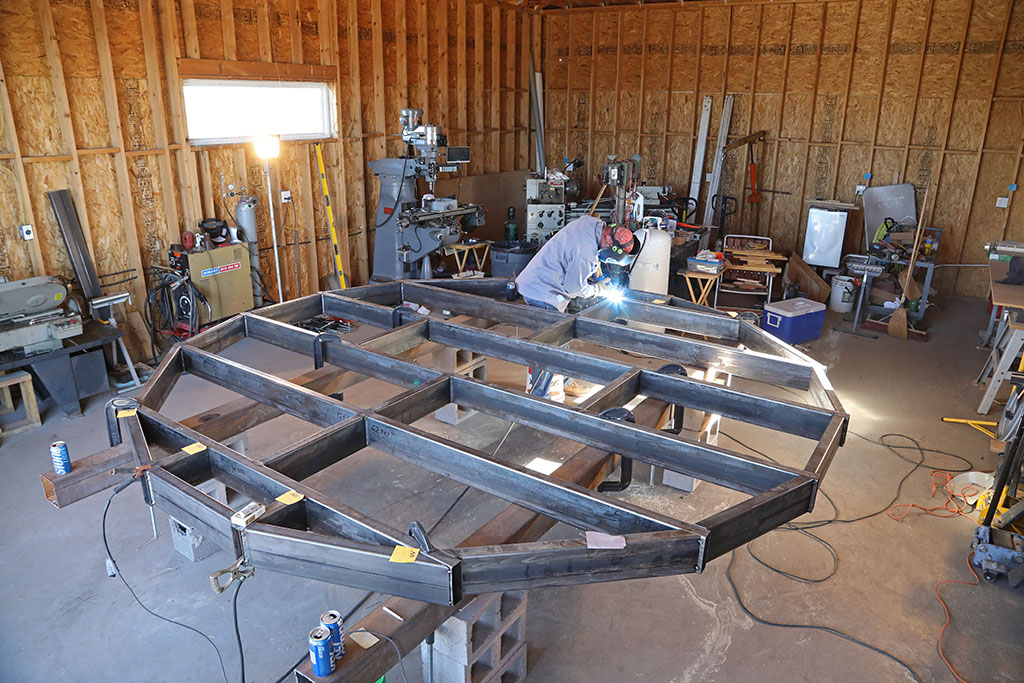
Donnie came today and welded up the floor joist assembly I had tacked together.
It still has to be partly disassembled (at the yellow stickers) to get it out the garage door.
I have to cut loose the end wings (at the spot welds), move it out the garage door and re-tack it.
Then Donnie can come and finish the welding.
Hopefully summer will stick around just a little bit longer.

Welding the wings back on.
So I had to take "the wings" off to get the assembly out the shop door, then we have to put the wings back on.
Of course it had to snow in the middle of this part of the operation.
In this picture one of the wings (far side) has been tacked back on and then we had to spin the assembly around
to tack the other wing on, once moved back inside the shop door.
Since it was not perfectly balanced I had to man-handle the spinning of it while Linda moved the tractor backward and forward.
Don't use this white rope. It stretches like crazy.
So now Donnie will come and do the real welding and then we can move the assembly out to the crane (background) and fly it up into place.
I don't think the big truck will have a problem lifting this.
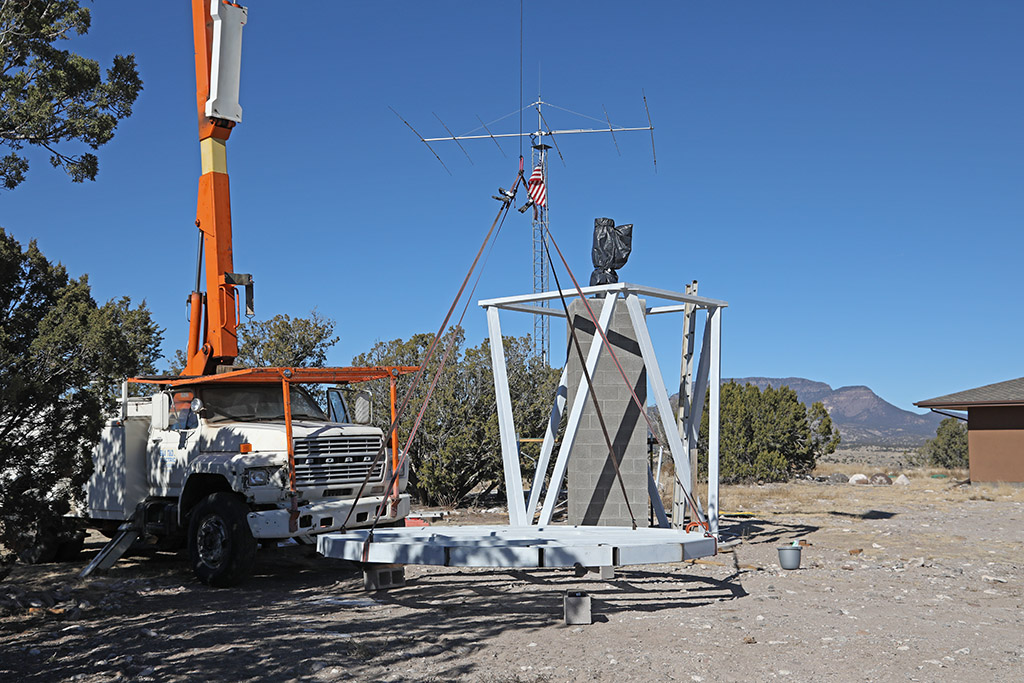
Test Fly.
Today we hooked up the floor joist assembly and raised it with the big truck. Here it is hovering about 1' above the concrete blocks.
I let it hang there for a bit while I took this picture and then I got my nerve up and
raised it straight up until it was high enough to clear the pier.
Then I lowered it back down to it's rest position on the concrete blocks.
So I guess the big truck will lift it.
Next I have to clean the surface rust off of the top of the ring so when the joist assembly
and the ring are welded together it can be painted (primer).
We also put a piece of guide rope through the longest joist so we can stay out of the way and still rotate the assembly.
Soon.
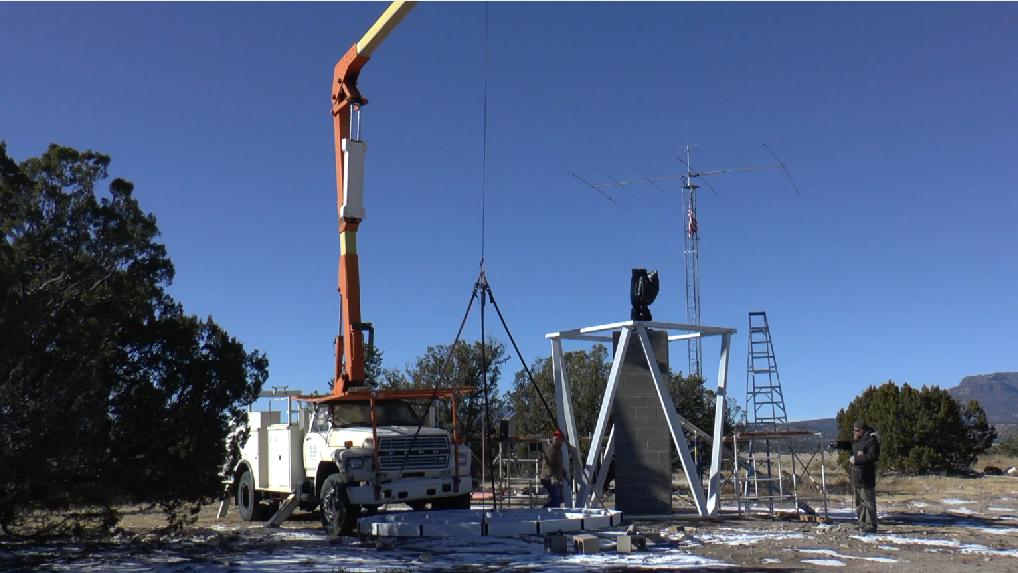
A few days later.....
....we actually did fly the floor joist assembly.
My friends asked me to video that event, so I did.
Here's is a link to that operation..... Biggus Liftus
We were very happy when this was over as we did not know for sure if the truck would lift it.
For some reason Apple devices do not like the sound part of this video even though it's just common MP4.
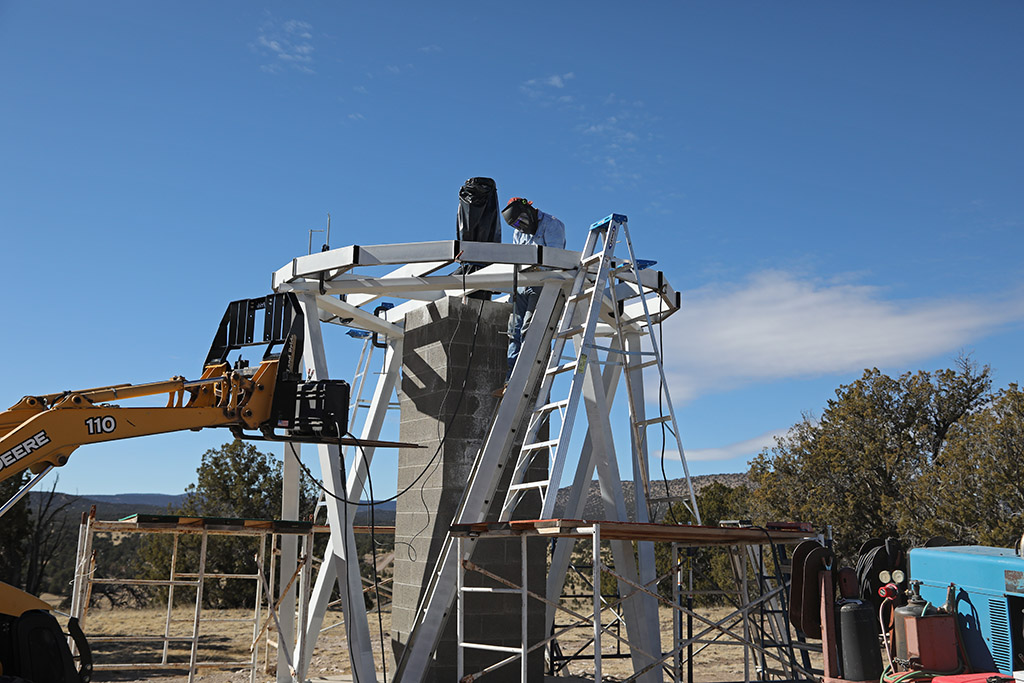
Joist Welding.
After the big lift we c-clamped the joist assembly down, once we got it right where it needed to be.
Today Donnie was able to get over after a long recovery from a fall he took on some ice, a few weeks ago.
He was able to get all the welding of the floor joist assembly done, even though the wind started to pick up in the afternoon.
I guess because he was welding down in between the joists, the wind could not hit the welding area directly.
We used the tractor to lift his welding unit up so the distance to the gun was not too great.
Mostly I just drove the tractor, watched and gophered.
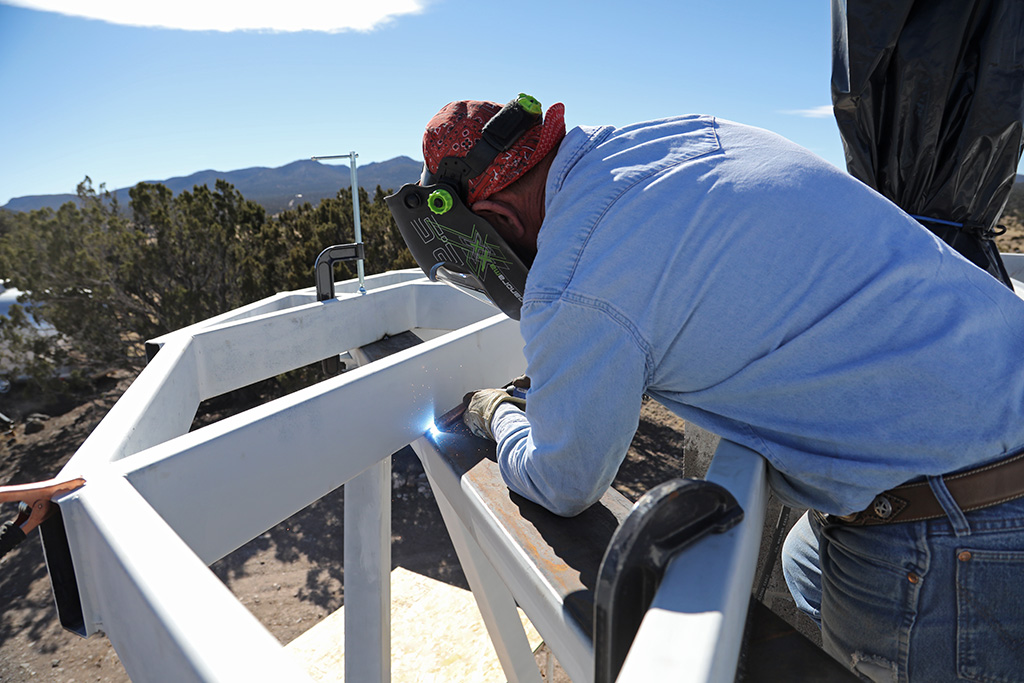
I don't think it is going anywhere now.
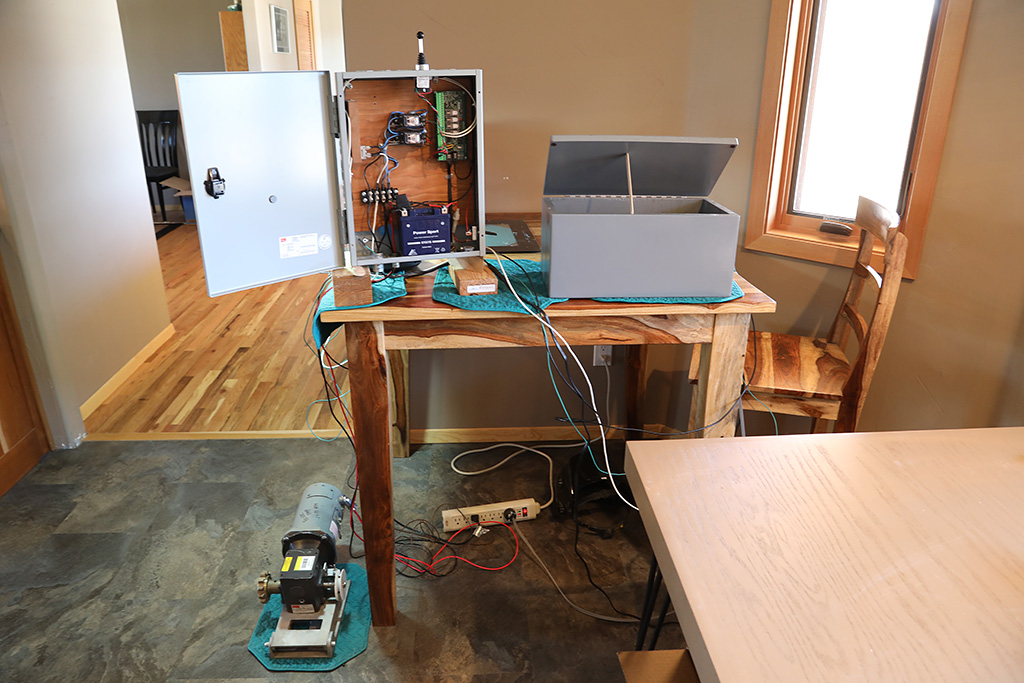
Work to do on the observatory during the miserable cold winter.
(Constructive things to do during the winter months on the Continental Divide.)
This winter's project is to get the dome rotation contraption working.
The 3 parts include the gray box on the table (right side) which holds a variac and 120vac power plug.
The metal box on the left side of the table which holds the pc card (etc.) which aims/controls the dome.
The motor reduction gear/motor sitting on the floor which actually rotates the dome.
On the bottom of the metal box (right side) is an RS-232 plug so the computer in the warm room can send
commands to the PC card and keep the slot in front of the scope.
I just got it all working so it can be put it out on a shelf in the garage until it's ready to mount in the observatory.
Hurry up spring!
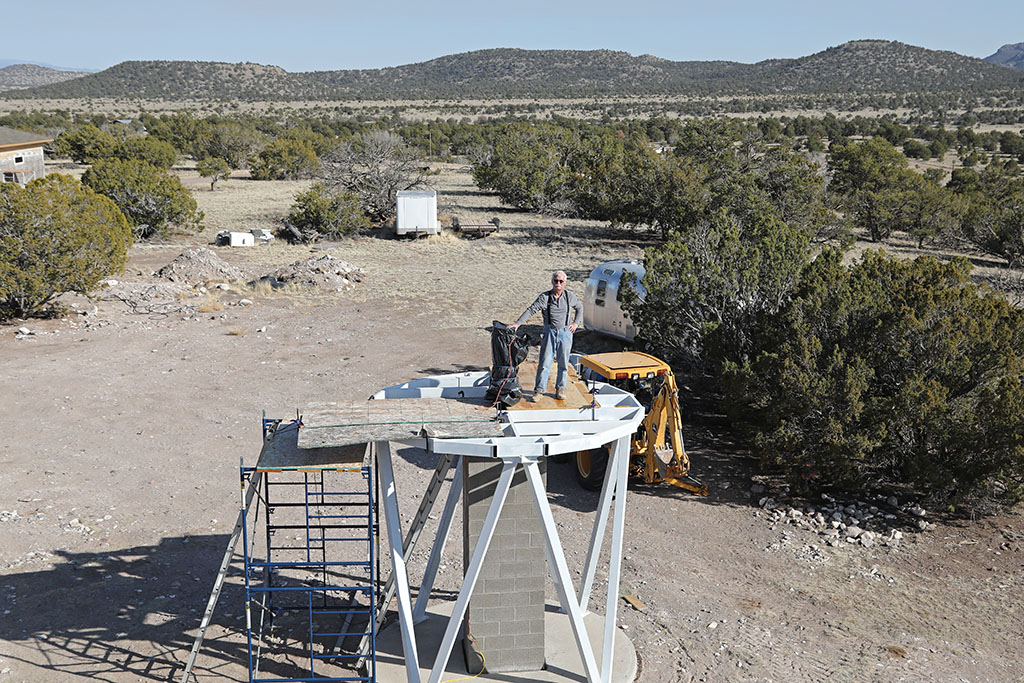
Got the first sheet of 1-1/8" T&G plywood on today.
Got the steel primed and put in enough self tapping screws in to hold the sheet down, until we get the adjoining sheets on.
Drill pilot hole, c-sink for the screw head and screw the screw in.
We put some old OSB (beaverboard) down just so it wasn't so scary as we moved around to paint and fasten.
You can work faster when you are not so afraid of falling through the floor.
Sure am glad it's finally spring.
Bought another 100 screws to add to the 100 I have. It's a nice view from here.
Got some smoke from a fire in the background making things a little grayish. 4 more sheets to go.
View is to the SSE.
Linda took this shot from the bucket truck.
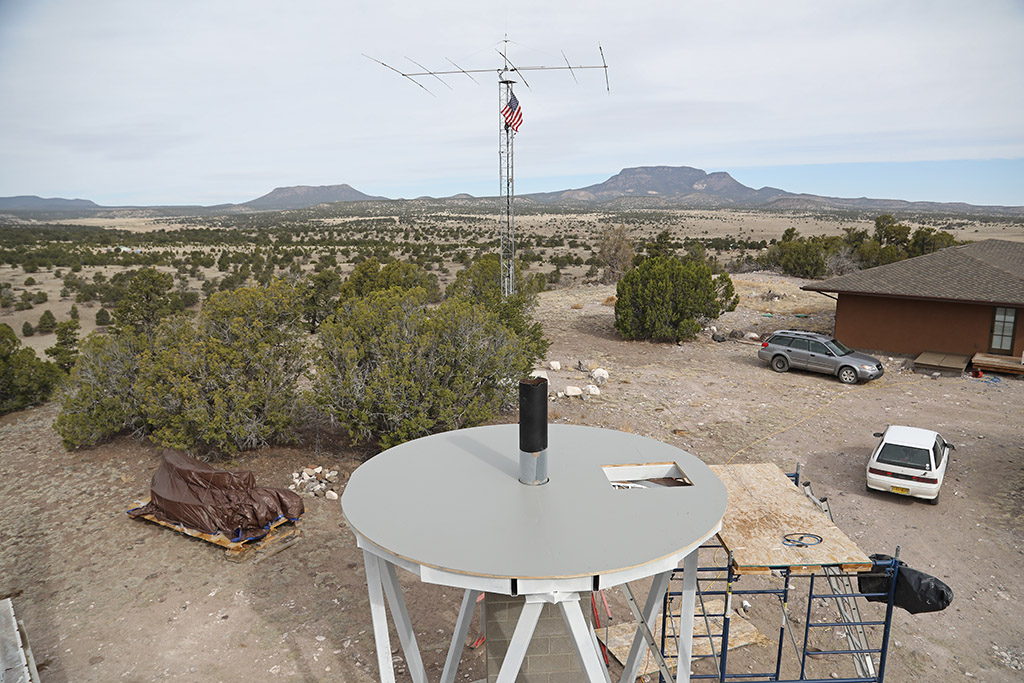
Now we have the floor finished and painted. We just got done with our second coat of Battleship Gray.
We wanted to hurry and get this sealed up as they are saying we may get snow on Sunday (?)
The gray bottom of the metal pier is visqueen to keep from slopping paint on the black.
I have the trap door cut and it's waiting for me to put the hinges on it.
Kind of gray today.
Linda ran me up in the bucket to take this photo.
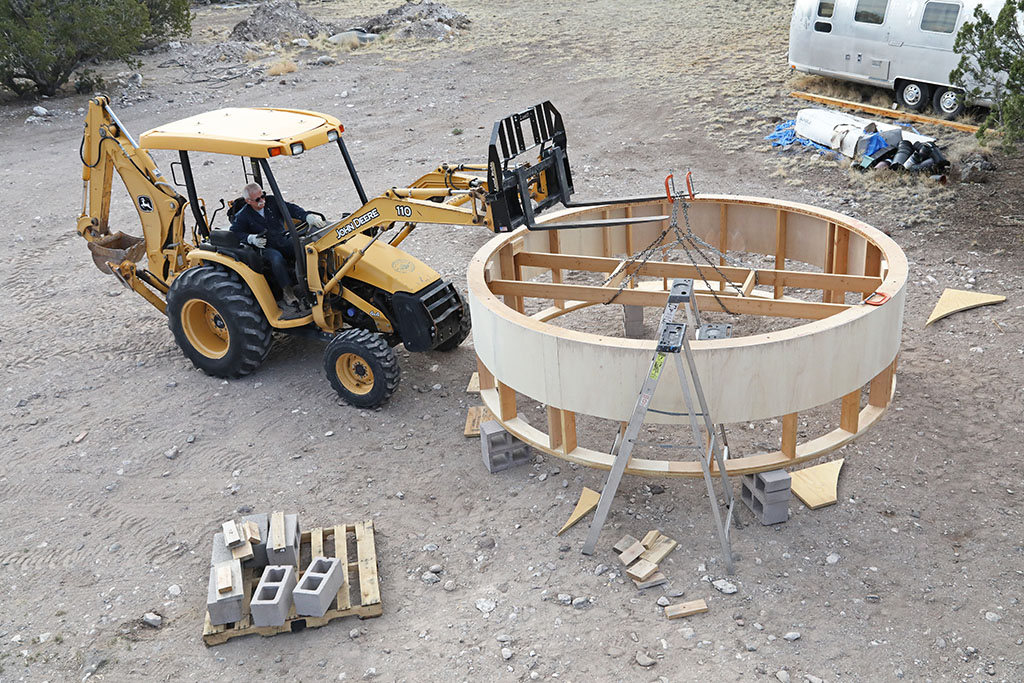
This past week we have been working on the wall that sits on the observatory floor that the dome will sit on.
We got done with the top half and decided to move it out by the observatory to give it a coat of paint.
Also wanted to check out the chain arrangement to see how well it would work or not work while it was only a foot off the ground.
It worked.
We'll give it a basic coat of paint and then raise it to the observatory floor and position it and screw it to the floor.
We will have to add a bottom layer of plywood once it's up there to attach it to the floor and cover the ugly joists.
Then another coat of paint.
Then I can actually start assembling the observatory on top of this wall.
Ultimately I'll get some nice white corrugated steel and dress the whole wall with that so it looks like a real observatory.
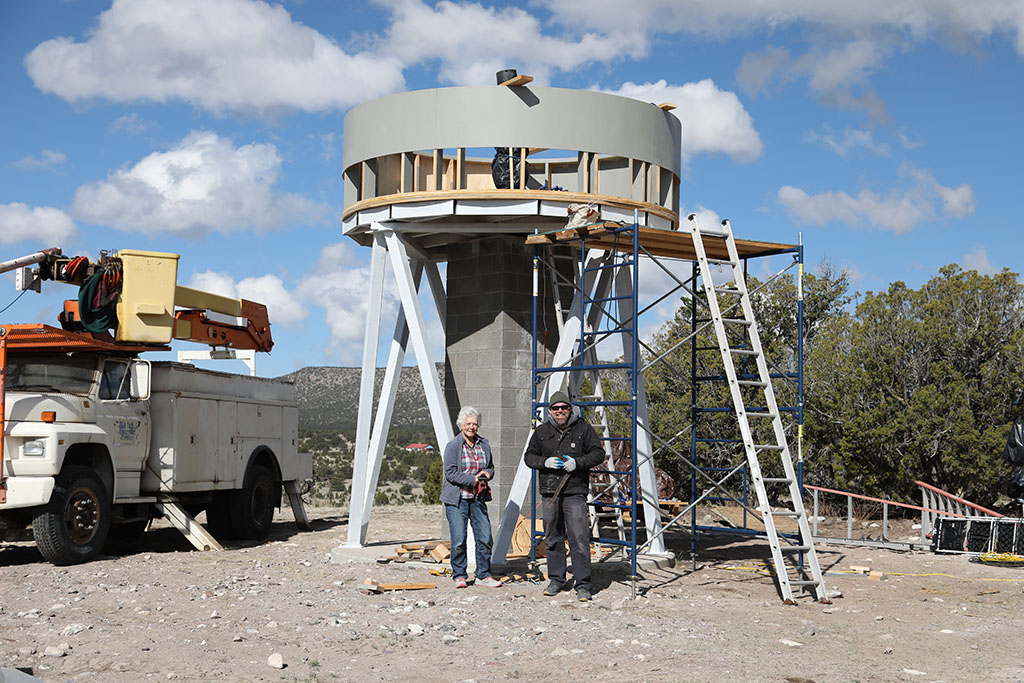
We had a relatively calm morning this morning and flew the wall up.
It went very smoothly. Even more smoothly than I had hoped.
After we got it up we put a large amount of screws through the bottom plate and into the floor.
What is even more surprising is how level it wound up.
I took the 6' level and went around the top plate and could not find enough problem to correct. Amazing.
So now we have to put the lower layer of plywood around the bottom and paint it.
Then we get to start on actually putting up the dome.
Pictured are Linda and Jeffery my faithful helpers. Jefferey, who does all the work I'm too old to do or am not agile enough to do,
and Linda who is just plain indispensable.
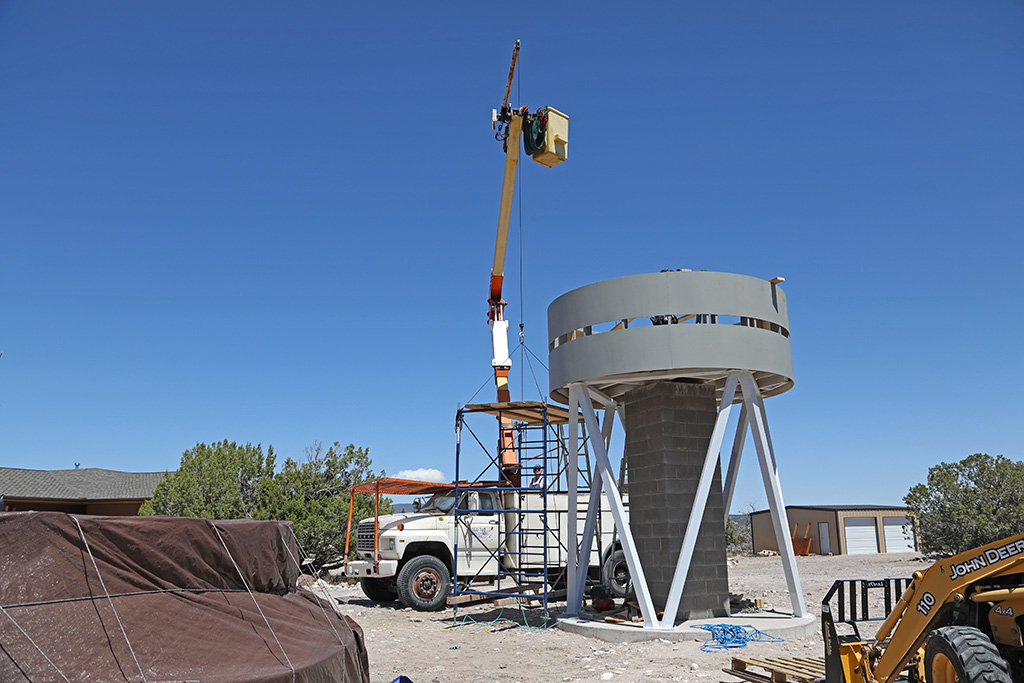
One of our latest lessons is that you can't lift a double set of scaffold with the tractor from the bottom.
I tried that once and did it successfully but it was one of the more scarier things I've done on this project.
So we rigged up a way to fly the scaffold using the good old big truck. It worked pretty well and nothing fell over.
Got the second (bottom) row of plywood on and painted. The last sheet in 45mph gusts.
They say we may get some rain tomorrow afternoon so we'll tarp it in the morning and take the rest of the day off.
Got to start shopping for the corrugated steel siding to put on over the plywood.
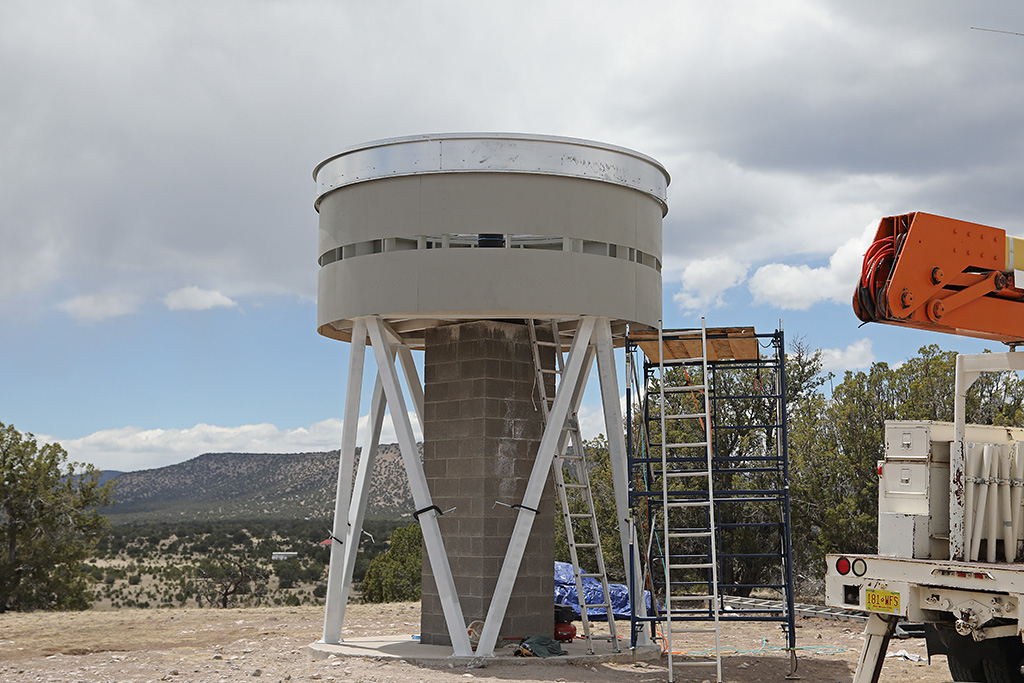
We actually have started the assembly of the observatory, amongst the rain storms, crazy winds and thunder/lightning.
This is today's status.....
We have bought the metal siding but are waiting for my super saw blade to come to cut it.
We have installed the wall track that holds the rollers that the dome rotates on. It screws to the top of the wall.
Installed the track segments that rolls on top of the rollers.
Installed the skirts which are the wide metal parts you can see in this picture.
Installed the azimuth gear rack that the motor fits into to turn the dome.
Finished the first coat of Battleship Gray on the interior.
Next is putting the metal siding on and putting the dome petals on,
which is the scariest part of the whole thing given the crazy winds we get.
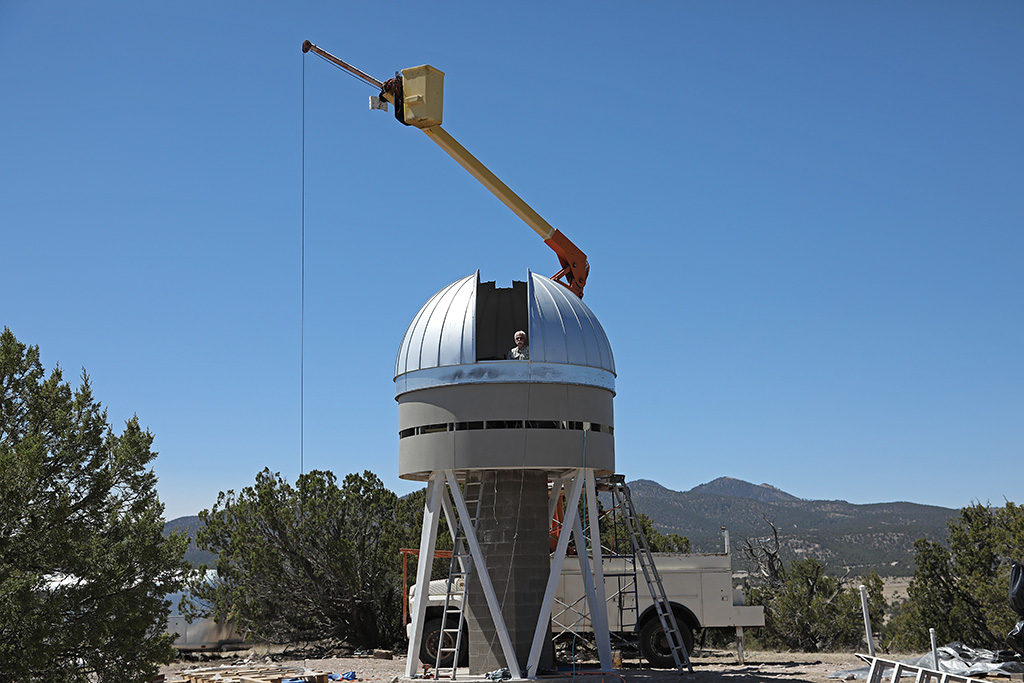
....and then there was a dome.
We picked a day when we could get extra help and the weatherman said the wind would be 12 mph.
What a liar.....it was 35.
Got started around 9.
It went a lot smoother than I feared. This was the scariest day of the project.
There were a total of four of us (picture to follow of assemblers). I'm so grateful for their help.
We've got a way to go, but this part is up and I won't lose nearly as much sleep over it as I have.
Again, the big truck earned its way.
It took us 3 hours to get the basic dome up and Jeffrey and I and Linda did the shutter opening tracks the rest of the day and part of the next day.
It needs a little touch up after waiting 15 years to get out of the garage.
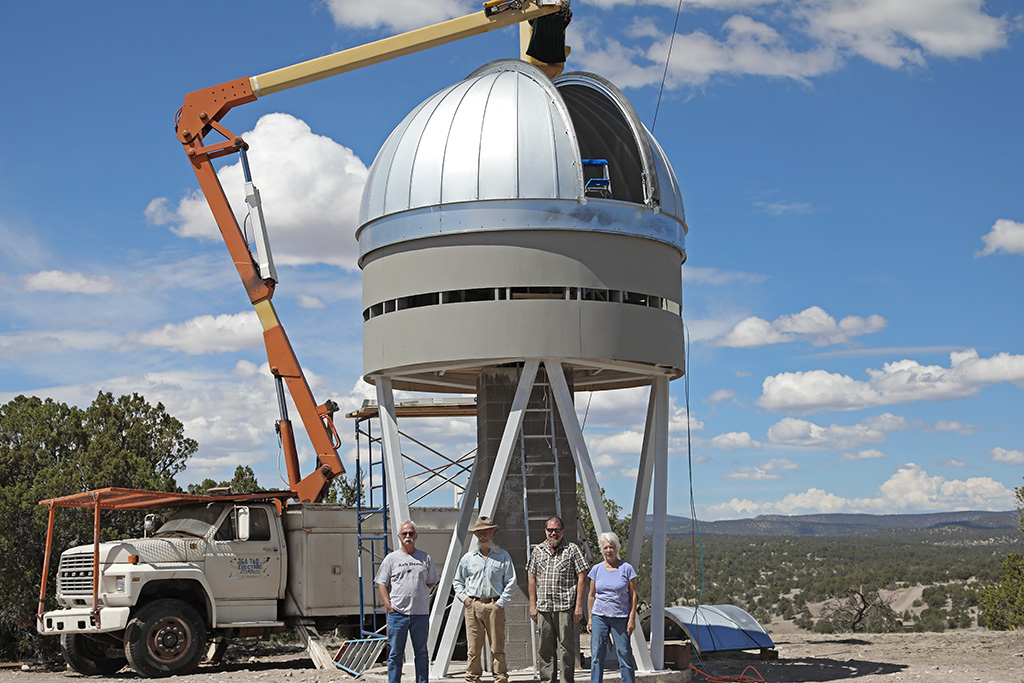
The assemblers of the dome.
Left to right.
Greg, Pat, Jeffrey, Linda
Daredevils all.
Next.....We put the doors on.
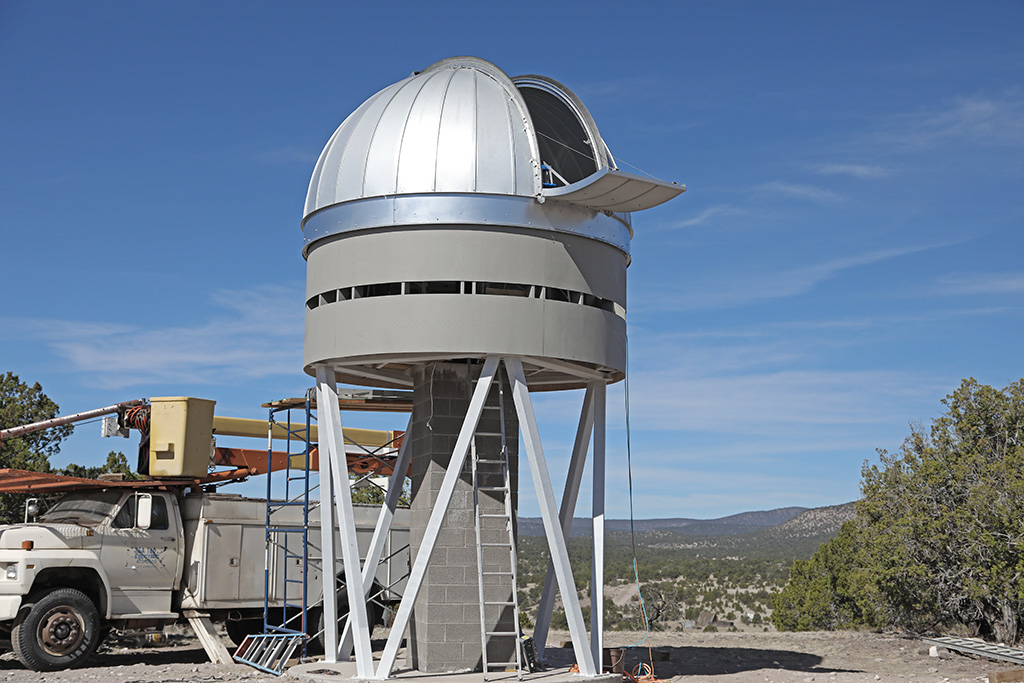
The doors are on!
Almost done with the outside.
Still fiddling with stuff on the inside and still have to put on the steel siding.
Doors go open!
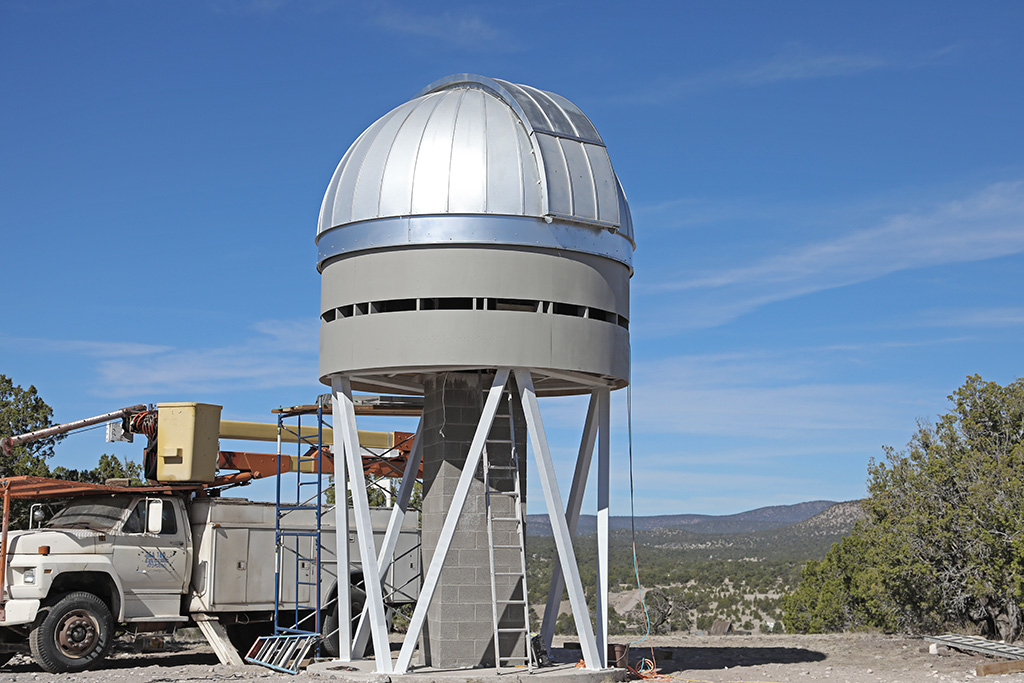
Doors go shut!
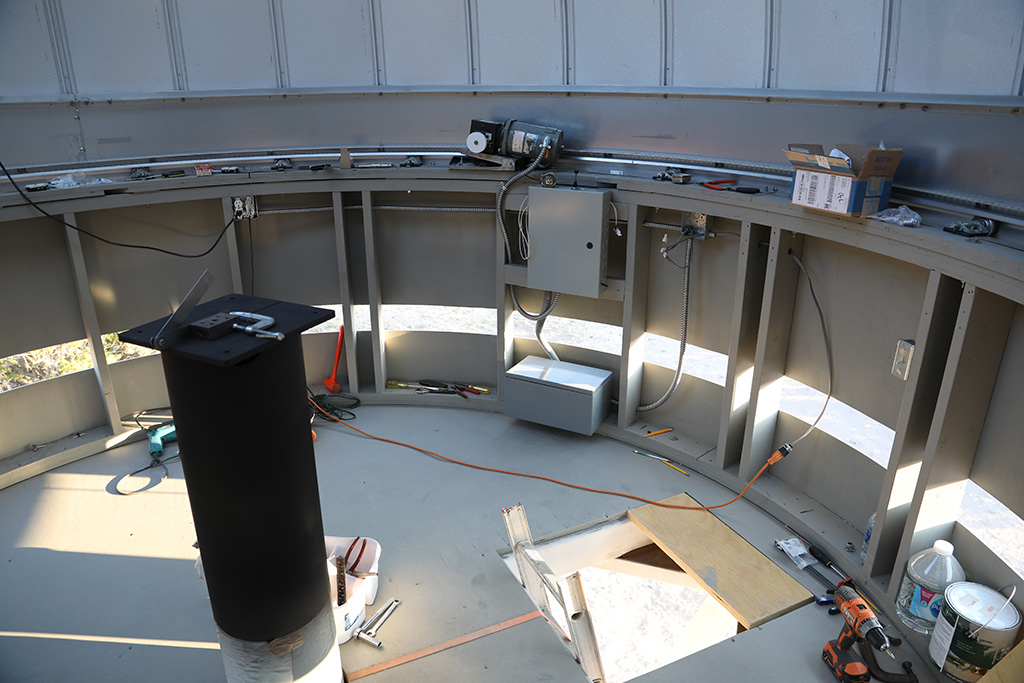
Working inside now but we'll starting putting on the steel siding soon.
Installing boxes and conduit, motors and what lights there will be.
Got the mount's mounting plate tacked to the pier and painted.
It's going to be much darker in here when the siding goes on.
We have to knock off about 10-11 as it starts heating up.
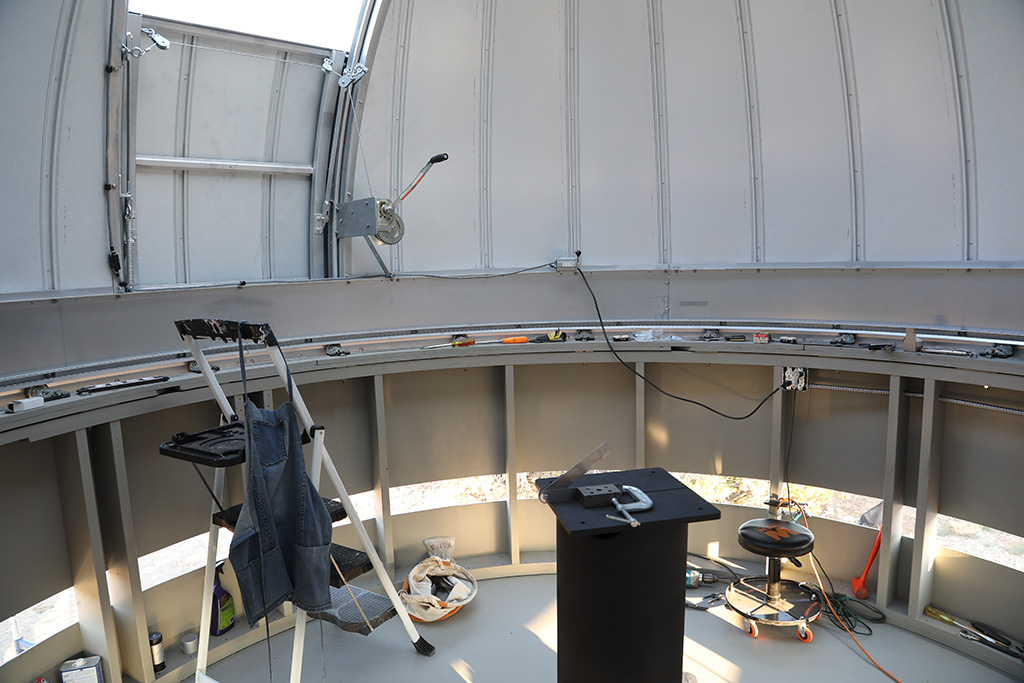
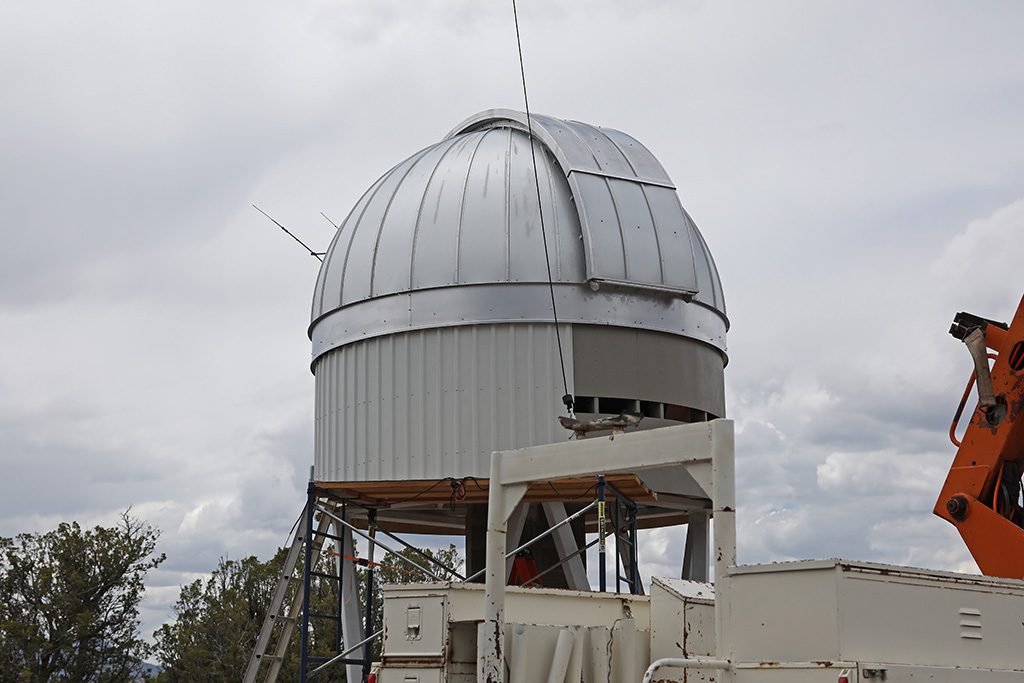
What we did today.
While waiting for one of the "Isolated T-Storms" to come electrocute us, we learned how to put on steel siding and got 4 sheets put up.
It will look a lot different when we are done.
We are using the big truck to pick up and move the scaffold.
Turns out we can only get 2 sheets put on and then have to move the scaffold.
I think we will have 13 or 14 sheets on total.
It started sprinkling right at the end.
It looks pretty good if you get back aways and hold your tongue just right.
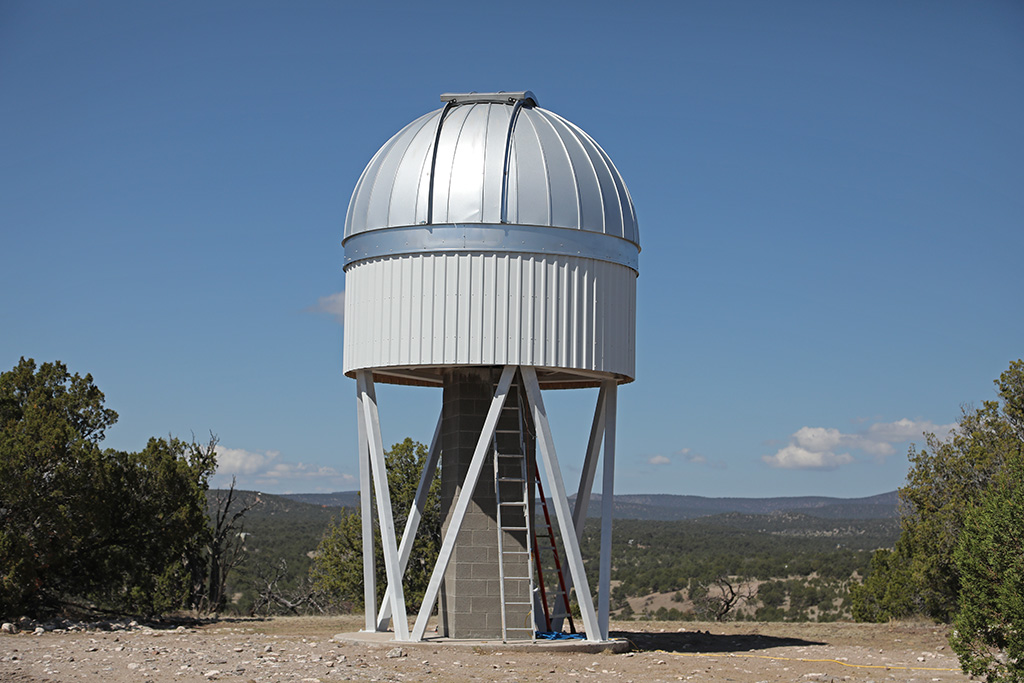
We finished the siding this morning.
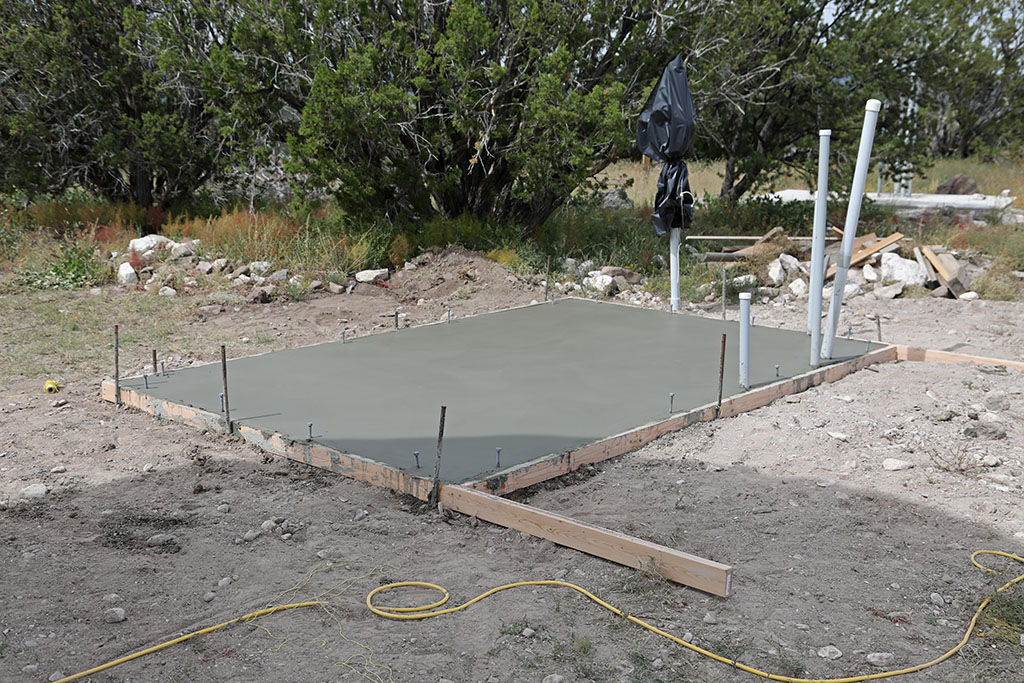
Building the warm room.
It starts with the slab
Next step is putting up the walls (once it dries of course).
Conduit is ready for wires and "L" bolts are ready to hold the walls.
This is where the control computers will be to control the camera, telescope, dome and telescope mount
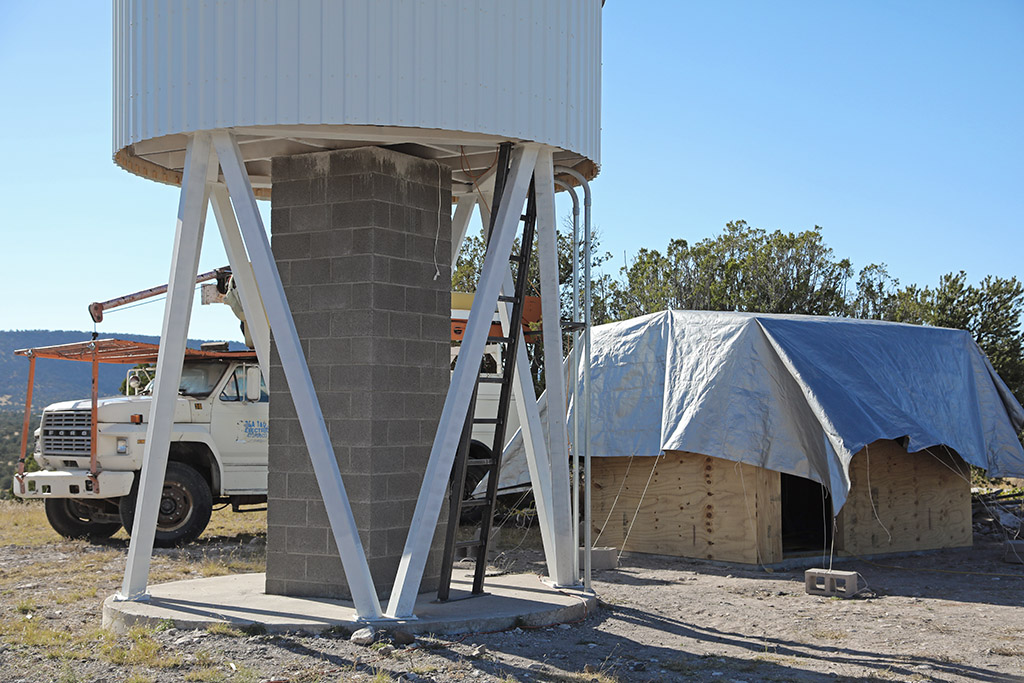
The permanent ladder is welded up and the walls for the warm room go up.
Next I've got to paint the ladder and build a roof for the warm room.
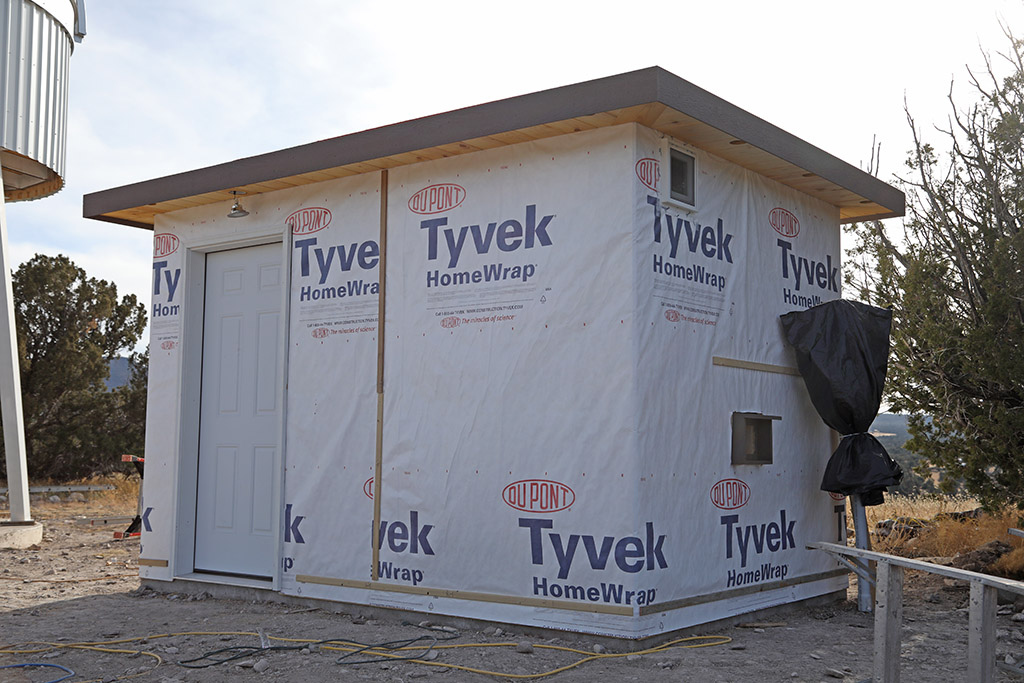
The walls are up, the roof framing is done and the soffit is installed.
Waiting now for Stucco installers and roofers.
Then I move indoors and start finishing.
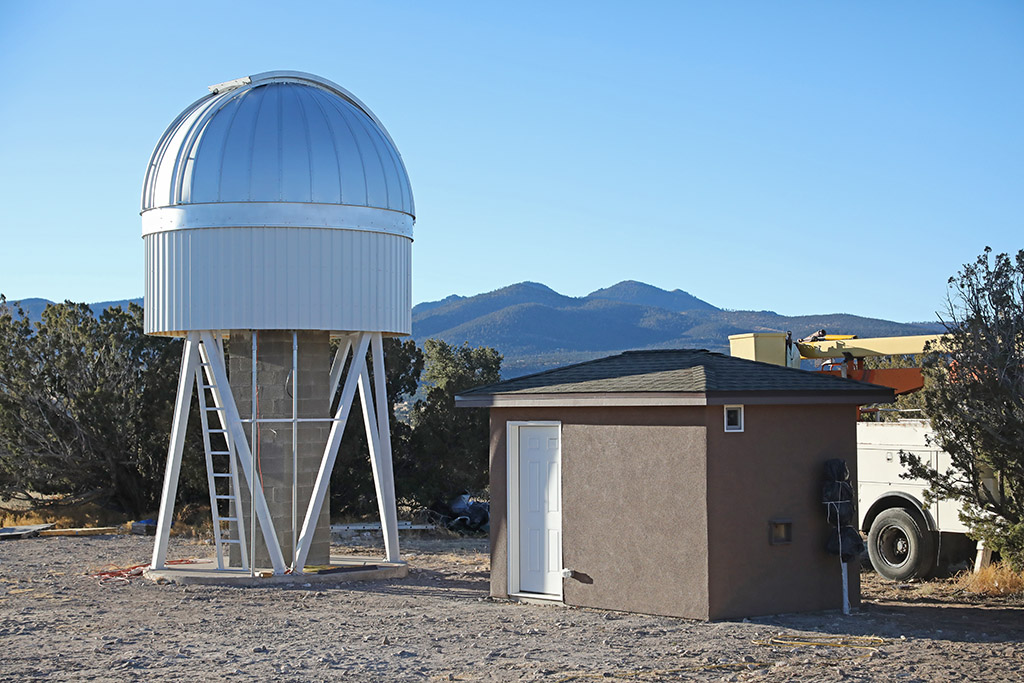
The stucco is on and we now have roofing on the roof so the exterior is pretty done.
Now we can move inside and start putting on the drywall etc.
Just in time since it's December and it's pretty cold outside.
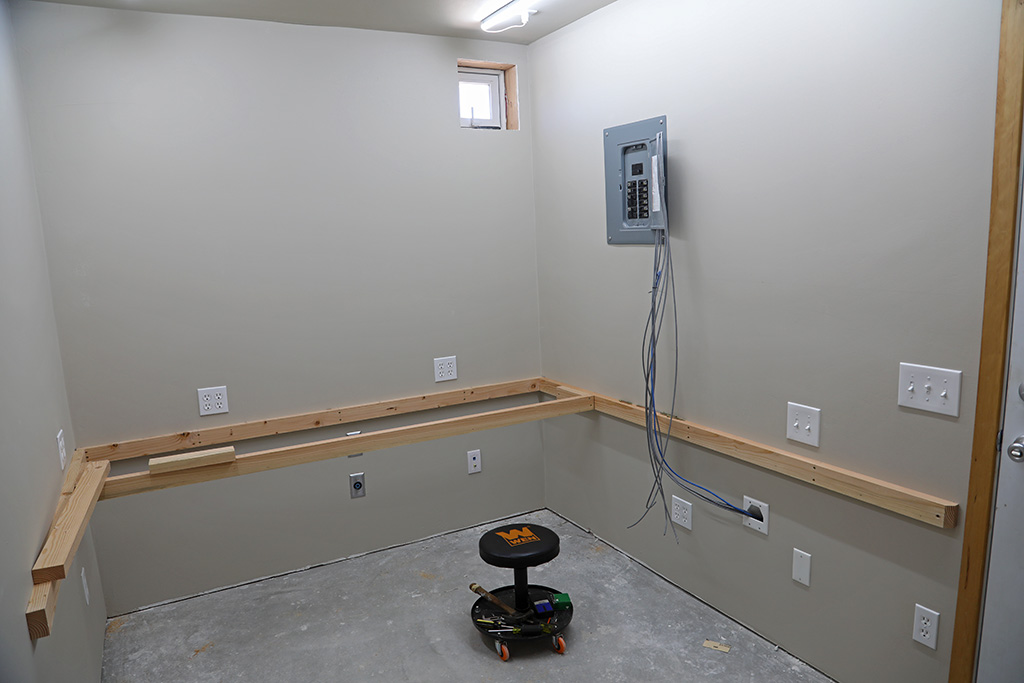
Working on the warm room.
Got the sheet rock on and the wires in.
I'm currently working on the framework for the counter tops.
On the right side will be the computer control area, to talk to the observatory.
In the center is the Ham Radio area.
On the left is the reloading area.
The door is on the far right.
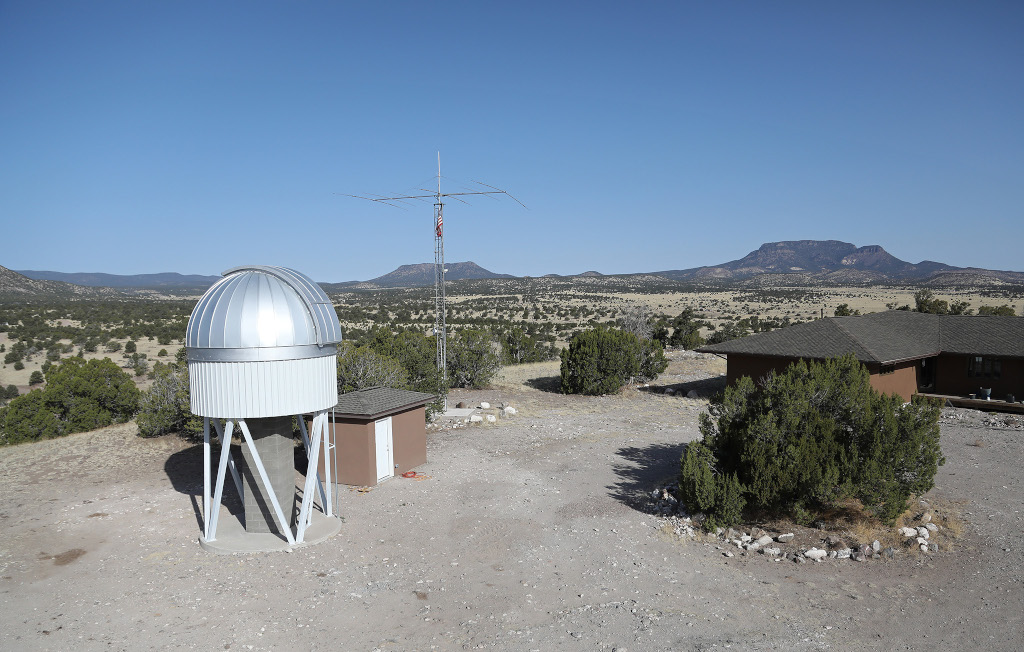
The Observatory, Warm Room, Radio Tower and Sleeping Quarters.
It's finally done!
Watch the Fly-By!
— BACK —